

Everything You Could Want to Know About Painting
ALL BLOG POSTS
Got Something In Mind?
We are not kidding about how much there is here. Search for what you’re looking for and make it easy on yourself, will ya?
Featured posts:


ALL POSTS
Is It Ok to Paint In Hot Weather?
With summer here you may think any day is fair game to paint the exterior of your home. I can tell you from first hand industry experience, that is simply not true!
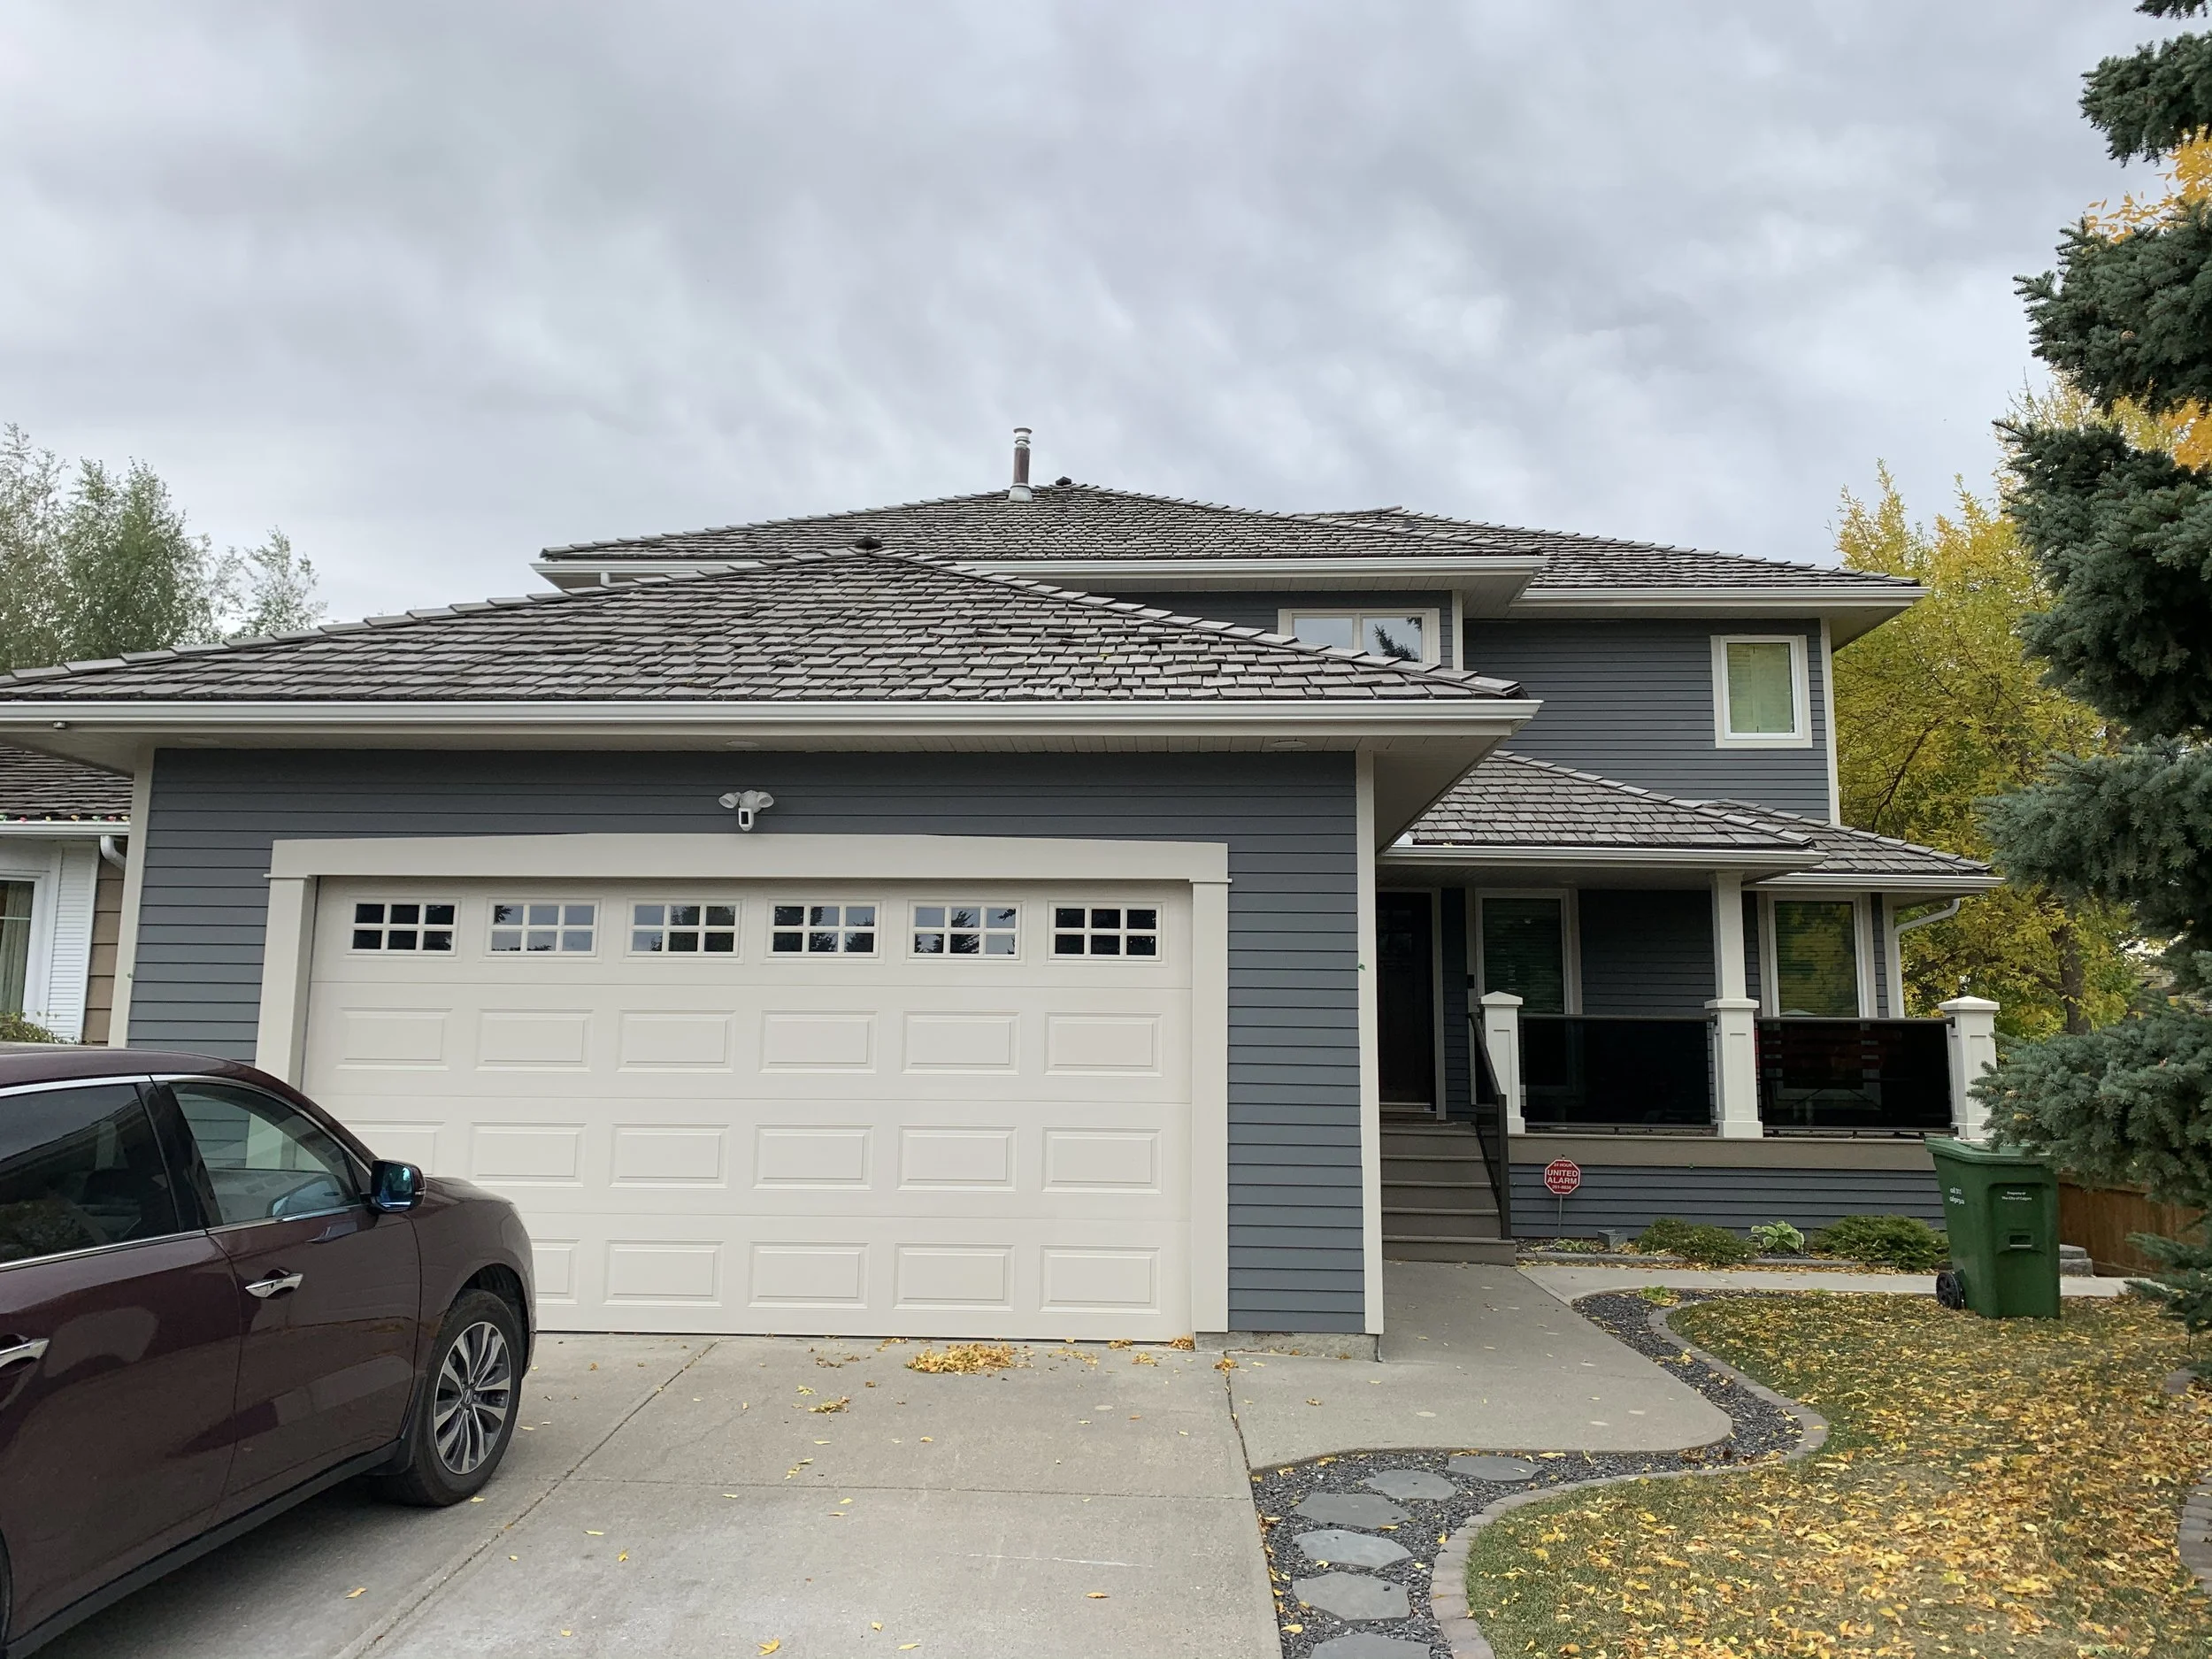
A beautiful exterior done by a #piparmy member in 2020!
Siding: Benjamin Moore - Steel Wool (2121-20)
In fact, in my business we have had more issues with paint/stain being applied when the temperature is too HOT than too cold.
Paint manufacturers (especially in Canada) spend a LOT of time with their formulas to make sure that the exterior paint season can be extended as long as possible, and paint can be applied outside in the lowest temps possible.
So what happens if it I paint when it’s too hot?
The most common failure that occurs when paint has been applied to a surface that is too hot to receive it is that it the top of the layer will dry too quickly, creating a gel in between the layer and the surface that does not cure properly and will *usually* peel during/after the first winter.
Check out this deck that we stained in my first year of business in the paint industry. It was a gorgeous sunny day, the perfect temperature when we started. However, by the end of the day, the surface temperature of the deck had become too hot unbeknownst to the staff.

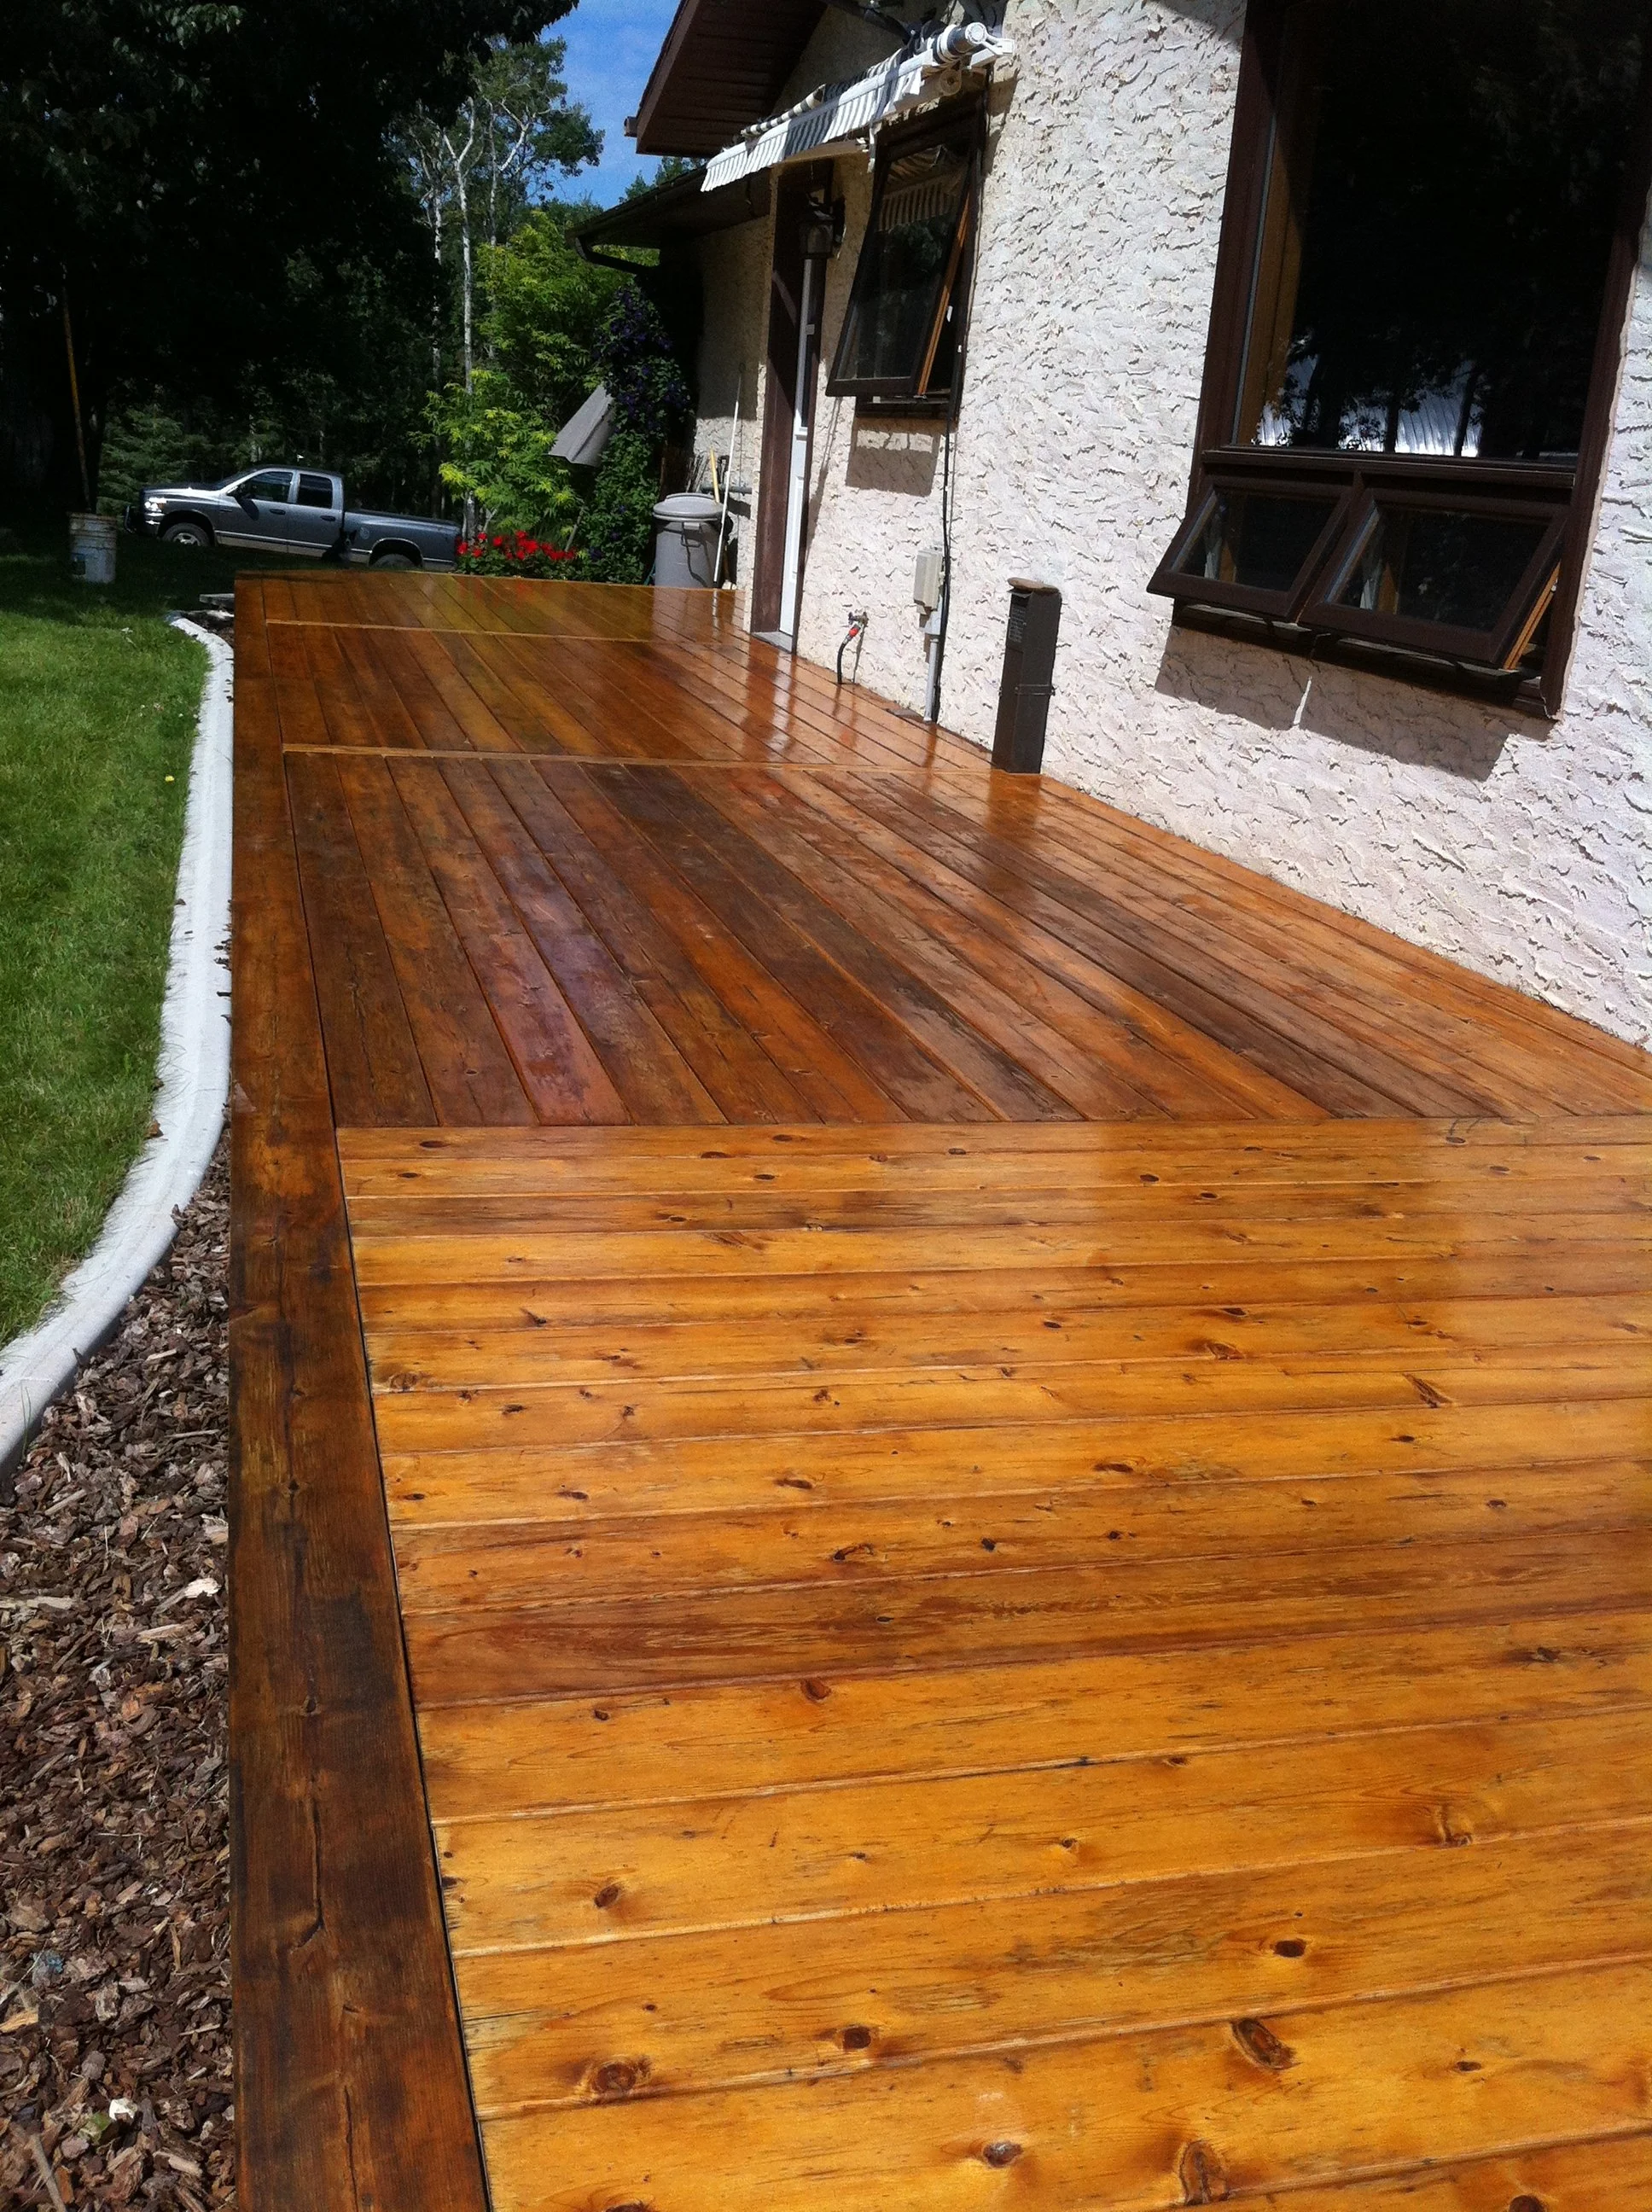
Sure enough, the next May I received a call from the client that the stain had failed over the winter. We went out and had to redo the prep and re-stain the deck for them.
So how do I know if it’s too hot to paint outside?
When painting exterior it’s extremely important to make your game plan according to the weather. You can plan to work on sides that are out of direct sunlight and work your way around. You can plan to get things done very early in the morning before the sun gets too hot. You can plan to NOT work on days that you know are too hot.
You can test your surface temp with this handy tip!
Simply place your hand on the surface to be painted prior to application. If you can barely place it there for a second, it is without a doubt, TOO HOT!
You must keep in mind that the surface also requires enough cure time BEFORE it reaches that temperature to ensure you have no problems down the line.
Try a test at the highest temperature the day before, and you can consider painting at that same temp the NEXT DAY, if the surface feels cool enough to touch.
24 hours of cure time should be allotted when applying STAIN (especially outside), before exposure to any extreme elements (rain included). You should always allow at least A MONTH before exposure to FREEZING temperatures (overnight included).

How to Paint Stucco like a Professional Painter
You may not realize that painting your stucco is an option, but painting stucco is an easy and cost effective way to update the look of your exterior without a huge investment.
The first step when painting the stucco on your house is to make sure it is nice and clean. You’re likely going to need a little more pressure than a garden hose can offer. When we are prepping stucco for painting, we are usually using a gas powered pressure washer with around 2500 psi. We start the pressure wash at the top of each wall and slowly work our way across and down to ensure no dirt actually gets pushed back up into the grooves. We want to make sure we are staying a safe distance away from the stucco as to make sure not to damage it.
After the stucco has been washed and has had plenty of time to dry out (time varies depending on the weather at the time), it is time to fix any patches of the stucco that may have cracked or damaged over the years. If the fixes are minor, grab some stucco patcher from your nearest home improvement store, as well as some putty knives and get to work! It is quite easy to patch little stucco sections so that they blend on your own. If your home has some bigger sections to be repaired, or a trickier stucco pattern to mimic, it might be time to call in some pros.
Once all the patching is done and had time to cure, it’s time to paint your stucco! The paint for the stucco can either be applied by brush and a really fluffy roller or by spray (likely with backroll). Make sure to choose a paint that is high quality and possibly an elastomeric. Chat with your trusted paint store rep to decide which option is right for you and your home. When you do exterior painting, it’s typically not the best place to cheap out on paint. A high quality product will really pay off with the durability of the paint and extend the life of your exterior paint job.
If you have questions relating the stucco painting or exterior painting, be sure to check out all articles related to the topic on our site.
If you’re not up for the challenge yourself, contact us for a referral from our professional painting network.


Uplevel your DIY projects with:
-LIFETIME access to the same contractor rates as we have at any:
Canada -Dulux or Sherwin Williams
USA - Sherwin Williams
-This is more than your basic contractor pricing. We have been working with these suppliers since 2010 and have established AMAZING discounts on our top-recommended products
-Pays for itself usually with the purchase of JUST TWO gallons at our discounted rates!
*Always make sure to check account pricing before having any paint tinted. Costs will vary according to product, make sure to choose a product that fits in your project budget.

Find the perfect white for every wall, trim, and trend.
Choosing a white paint color seems easy—until you’re staring at 200 nearly identical swatches in different lights. This beautifully designed guide takes the guesswork out of choosing the right white by breaking down the 10 most popular white paints used by designers and pros—plus 7 bonus shades that let you know which colors are equivalents of each other and similar whites to the different colors..
Inside, you’ll find:
Clear descriptions of each white’s undertone, warmth, and light reflectance
Real room photos for easy visual comparison
Tips on pairing whites with wood tones, flooring, and countertops
Suggestions for which whites work best with dated finishes from different decades and trends
Guidance on sheen impact and selection
Whether you're painting a modern new build or refreshing a dated home, this ebook can help you avoid costly mistakes and confidently choose the right white—no regrets.

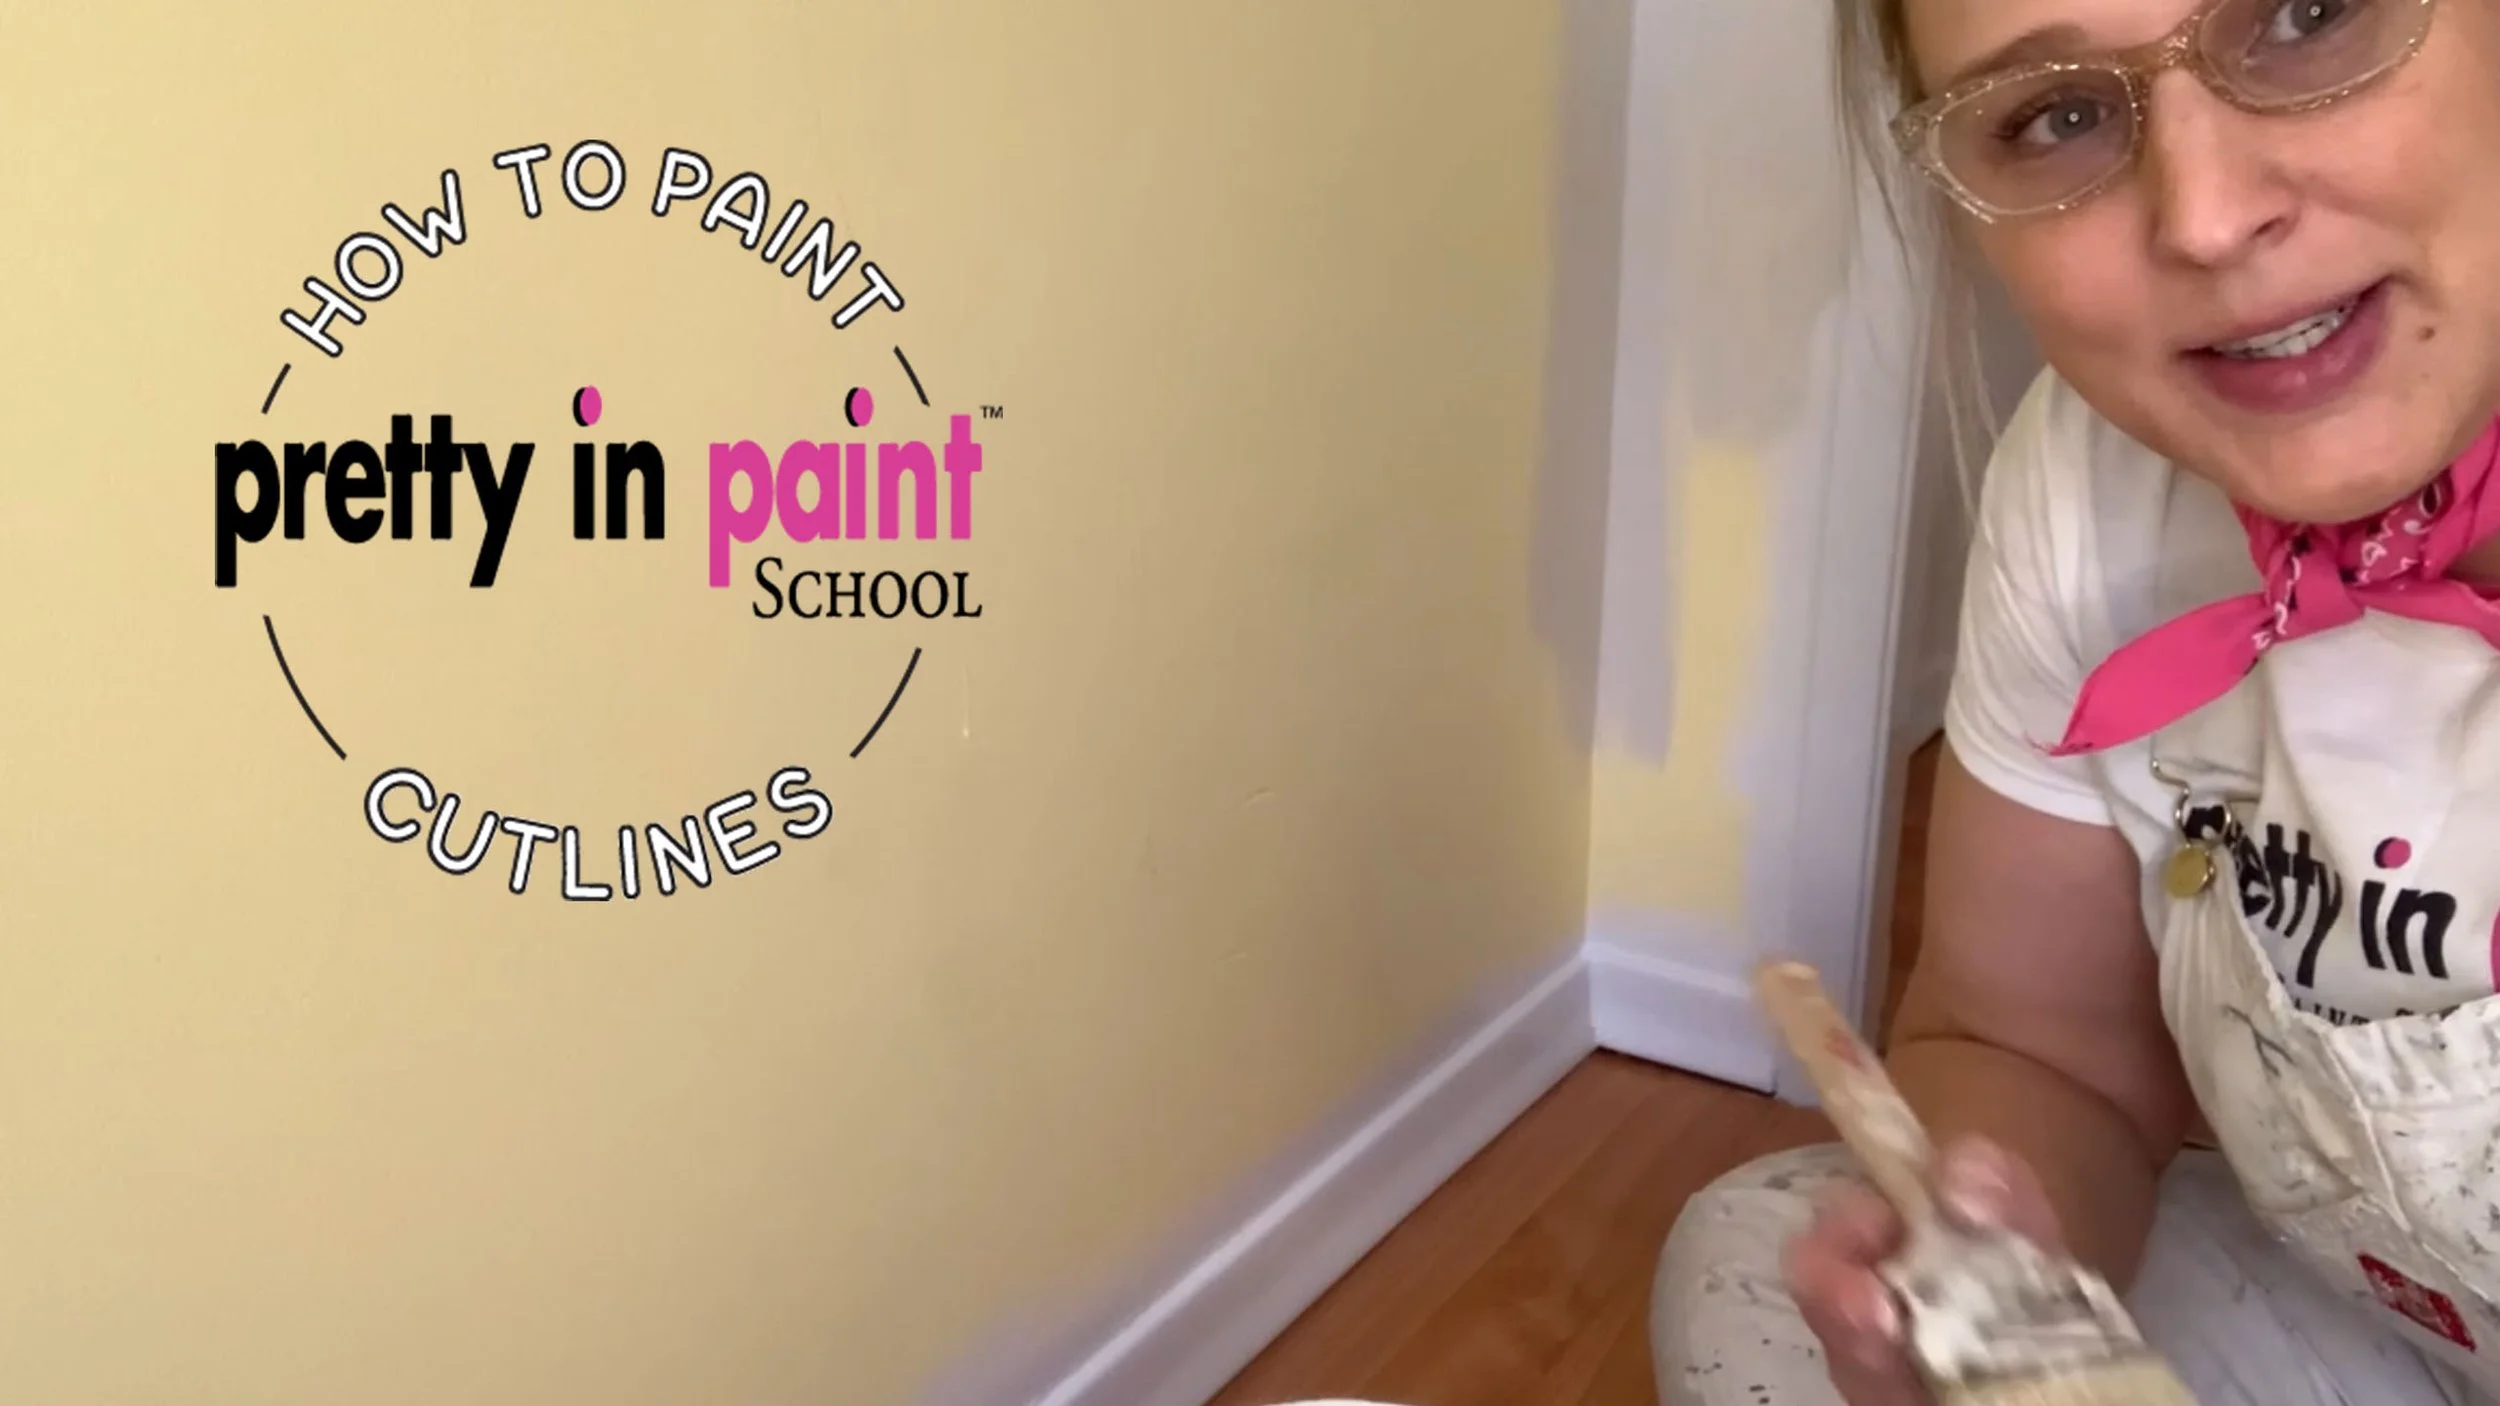
How to Paint Straight Lines
I filmed this a couple years ago and IT SHOWS haha.
Another piece of content I filmed early on when I was really just STARTING to learn how to film, edit, how to even talk to a camera for that matter :’).
BUT, this instruction HOLDS UP. Not only does it hold up, it’s a total approach that shows you how to cut in almost every angle that you will need to know inside:
-how to paint along ceilings
-how to paint around trim
-how to cut baseboards
-how to cut angled corners without tape
-how to cut without tape
-how to paint without tape
I chose the title “How to Paint Straight Lines” because THAT is apparently the top searched thing that has been missing from this page, and also what leads people here the most.
If I didn’t know that, I would have labeled it what the file has been called: “How to do Cut Lines”, which may have reached less of you!
More on my hate for having to learn technology to share my tips with you for a later episode ;)
This video has been IN PROGRESS for far too long and too many visitors have missed out on its valuable info, BUT alas, it is HERE!
Check it out and let me know what you think in the comments. :)
Uplevel your DIY projects with:
-LIFETIME access to the same contractor rates as we have at any:
Canada -Dulux or Sherwin Williams
USA - Sherwin Williams
-This is more than your basic contractor pricing. We have been working with these suppliers since 2010 and have established AMAZING discounts on our top-recommended products
-Pays for itself usually with the purchase of JUST TWO gallons at our discounted rates!
*Always make sure to check account pricing before having any paint tinted. Costs will vary according to product, make sure to choose a product that fits in your project budget.
Find the perfect white for every wall, trim, and trend.
Choosing a white paint color seems easy—until you’re staring at 200 nearly identical swatches in different lights. This beautifully designed guide takes the guesswork out of choosing the right white by breaking down the 10 most popular white paints used by designers and pros—plus 7 bonus shades that let you know which colors are equivalents of each other and similar whites to the different colors..
Inside, you’ll find:
Clear descriptions of each white’s undertone, warmth, and light reflectance
Real room photos for easy visual comparison
Tips on pairing whites with wood tones, flooring, and countertops
Suggestions for which whites work best with dated finishes from different decades and trends
Guidance on sheen impact and selection
Whether you're painting a modern new build or refreshing a dated home, this ebook can help you avoid costly mistakes and confidently choose the right white—no regrets.

Expert color advice from the comfort of your home.
Choosing paint colors shouldn’t feel overwhelming—or like a guessing game. Our Virtual Color Consultation takes the stress out of selecting the perfect colors, whether you’re refreshing a single room or revamping your entire home. Guided by an experienced designer with a background in the trades, we offer custom-tailored recommendations that align with your lighting, finishes, style, and goals.
Options:
1 Room (1 Color) - Choose this if you are in need of ONE color for ONE room or area. This could be an option for your entire home IF hard finishes (counters, tiles, flooring, cabinets) are the same and/or are matching throughout your home.
Room + 1 (2 Colors) - Choose this if you need ONE main color and one accent color for a room or area. Main color + accent color for a wall for example OR wall color & trim color
Full Color - (up to 3 Colors) - Choose this option if you have a home that needs one main color but also needs an accent color AND/ OR an entirely different color for different rooms due to mismatched surfaces or Renos done on certain rooms.
What's Included:
A simple client intake form to understand your space, style, and needs
Photo or video submission instructions to help us “see” your space clearly
Personalized color recommendations
A selection with brand-specific paint names and finishes (Benjamin Moore, Sherwin-Williams, etc.)
Testing Tips
*3-5 Business Day Turnaround After Qualified Photos Received
You Will Receive Instructions on Hoe to Proceed Once We Receive Your Payment

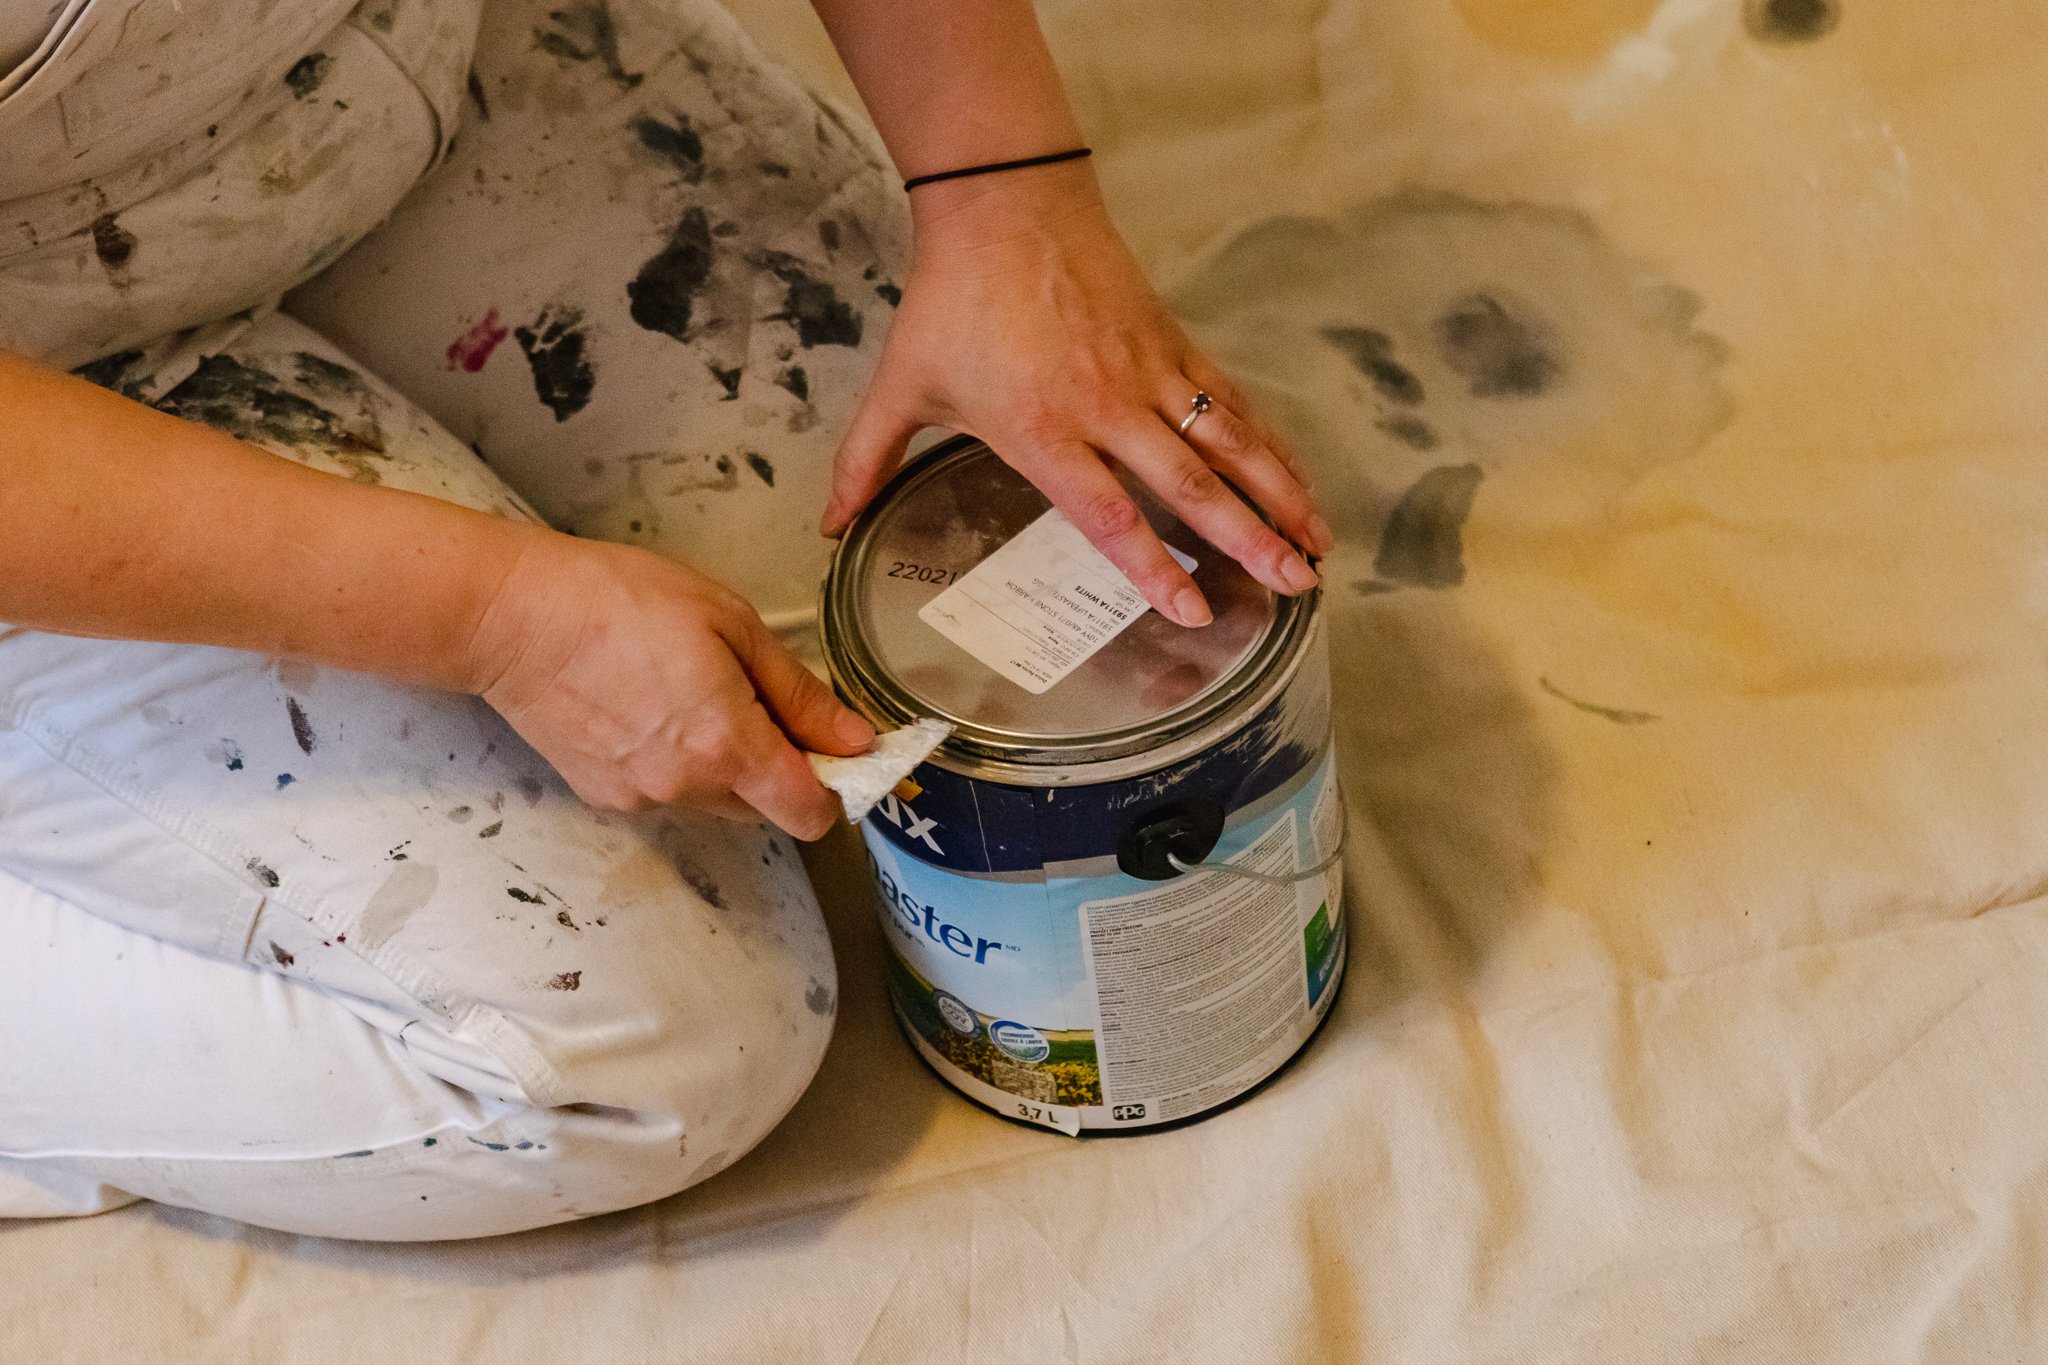
How to Open A Paint Can
Let me start this posting by thanking the mighty Google for telling me what YOU, the people of the internet WANT & NEED to see!
Apparently this is a trending search, and the only thing I was going to have on this site initially about opening a paint can was the handy dandy tip I will show you after we cover just HOW to open a paint can in general.

Let me second of all thank our wonderful photographer for capturing this photo before I knew I needed it!
It’s not the perfect photo, but I think it gets the job done. In my hand is a 5-in-1 paint tool. You totally have one of those, right? Because of that conversation we had about making sure you have all the right gear to do the job, so you can get back to doing things in your normal life that you like doing just a wee bit more, faster? If you haven’t scored it already, make sure to pick up our FREE handy dandy Gear Guide.
In this case, using the right tool is just SO much easier than anything else you can “make due” with (and trust me, I have BEEN THERE). AND you can score these often at the local dollar store near you for $1-2!
This tool is specifically designed for painters and the long flat side is PERFECT to stick on between the lid and sides to lift off with just a few turns of the wrist! Simply place the flat side in one of the grooves as shown above and turn your wrist to start to lift off a side of the lid. Repeat in as many spots and as many times as necessary to remove that sucker!
I promise I will take some more photos and/or video if you tell me we need more guidance on this one, so don’t give up on me just yet!
Let’s talk about that other cool tip I talked about sharing above for a minute.
Again, ANOTHER reason to make sure to have this tool. (I’m not getting paid a commission on sales of these things either…I WISH!)
The first time you remove your paint lid from the can, it is best advised to take the OTHER side of this tool and use your hammer (also handy, right?) to make four holes around the outside lip of the can. This helps any paint buildup fall straight back into the can and helps make sure your lid can and will go back on every time you need to put it back on during your project, and will also make it a lot easier to open too!
Uplevel your DIY projects with:
-LIFETIME access to the same contractor rates as we have at any:
Canada -Dulux or Sherwin Williams
USA - Sherwin Williams
-This is more than your basic contractor pricing. We have been working with these suppliers since 2010 and have established AMAZING discounts on our top-recommended products
-Pays for itself usually with the purchase of JUST TWO gallons at our discounted rates!
*Always make sure to check account pricing before having any paint tinted. Costs will vary according to product, make sure to choose a product that fits in your project budget.
Find the perfect white for every wall, trim, and trend.
Choosing a white paint color seems easy—until you’re staring at 200 nearly identical swatches in different lights. This beautifully designed guide takes the guesswork out of choosing the right white by breaking down the 10 most popular white paints used by designers and pros—plus 7 bonus shades that let you know which colors are equivalents of each other and similar whites to the different colors..
Inside, you’ll find:
Clear descriptions of each white’s undertone, warmth, and light reflectance
Real room photos for easy visual comparison
Tips on pairing whites with wood tones, flooring, and countertops
Suggestions for which whites work best with dated finishes from different decades and trends
Guidance on sheen impact and selection
Whether you're painting a modern new build or refreshing a dated home, this ebook can help you avoid costly mistakes and confidently choose the right white—no regrets.
Expert color advice from the comfort of your home.
Choosing paint colors shouldn’t feel overwhelming—or like a guessing game. Our Virtual Color Consultation takes the stress out of selecting the perfect colors, whether you’re refreshing a single room or revamping your entire home. Guided by an experienced designer with a background in the trades, we offer custom-tailored recommendations that align with your lighting, finishes, style, and goals.
Options:
1 Room (1 Color) - Choose this if you are in need of ONE color for ONE room or area. This could be an option for your entire home IF hard finishes (counters, tiles, flooring, cabinets) are the same and/or are matching throughout your home.
Room + 1 (2 Colors) - Choose this if you need ONE main color and one accent color for a room or area. Main color + accent color for a wall for example OR wall color & trim color
Full Color - (up to 3 Colors) - Choose this option if you have a home that needs one main color but also needs an accent color AND/ OR an entirely different color for different rooms due to mismatched surfaces or Renos done on certain rooms.
What's Included:
A simple client intake form to understand your space, style, and needs
Photo or video submission instructions to help us “see” your space clearly
Personalized color recommendations
A selection with brand-specific paint names and finishes (Benjamin Moore, Sherwin-Williams, etc.)
Testing Tips
*3-5 Business Day Turnaround After Qualified Photos Received
You Will Receive Instructions on Hoe to Proceed Once We Receive Your Payment

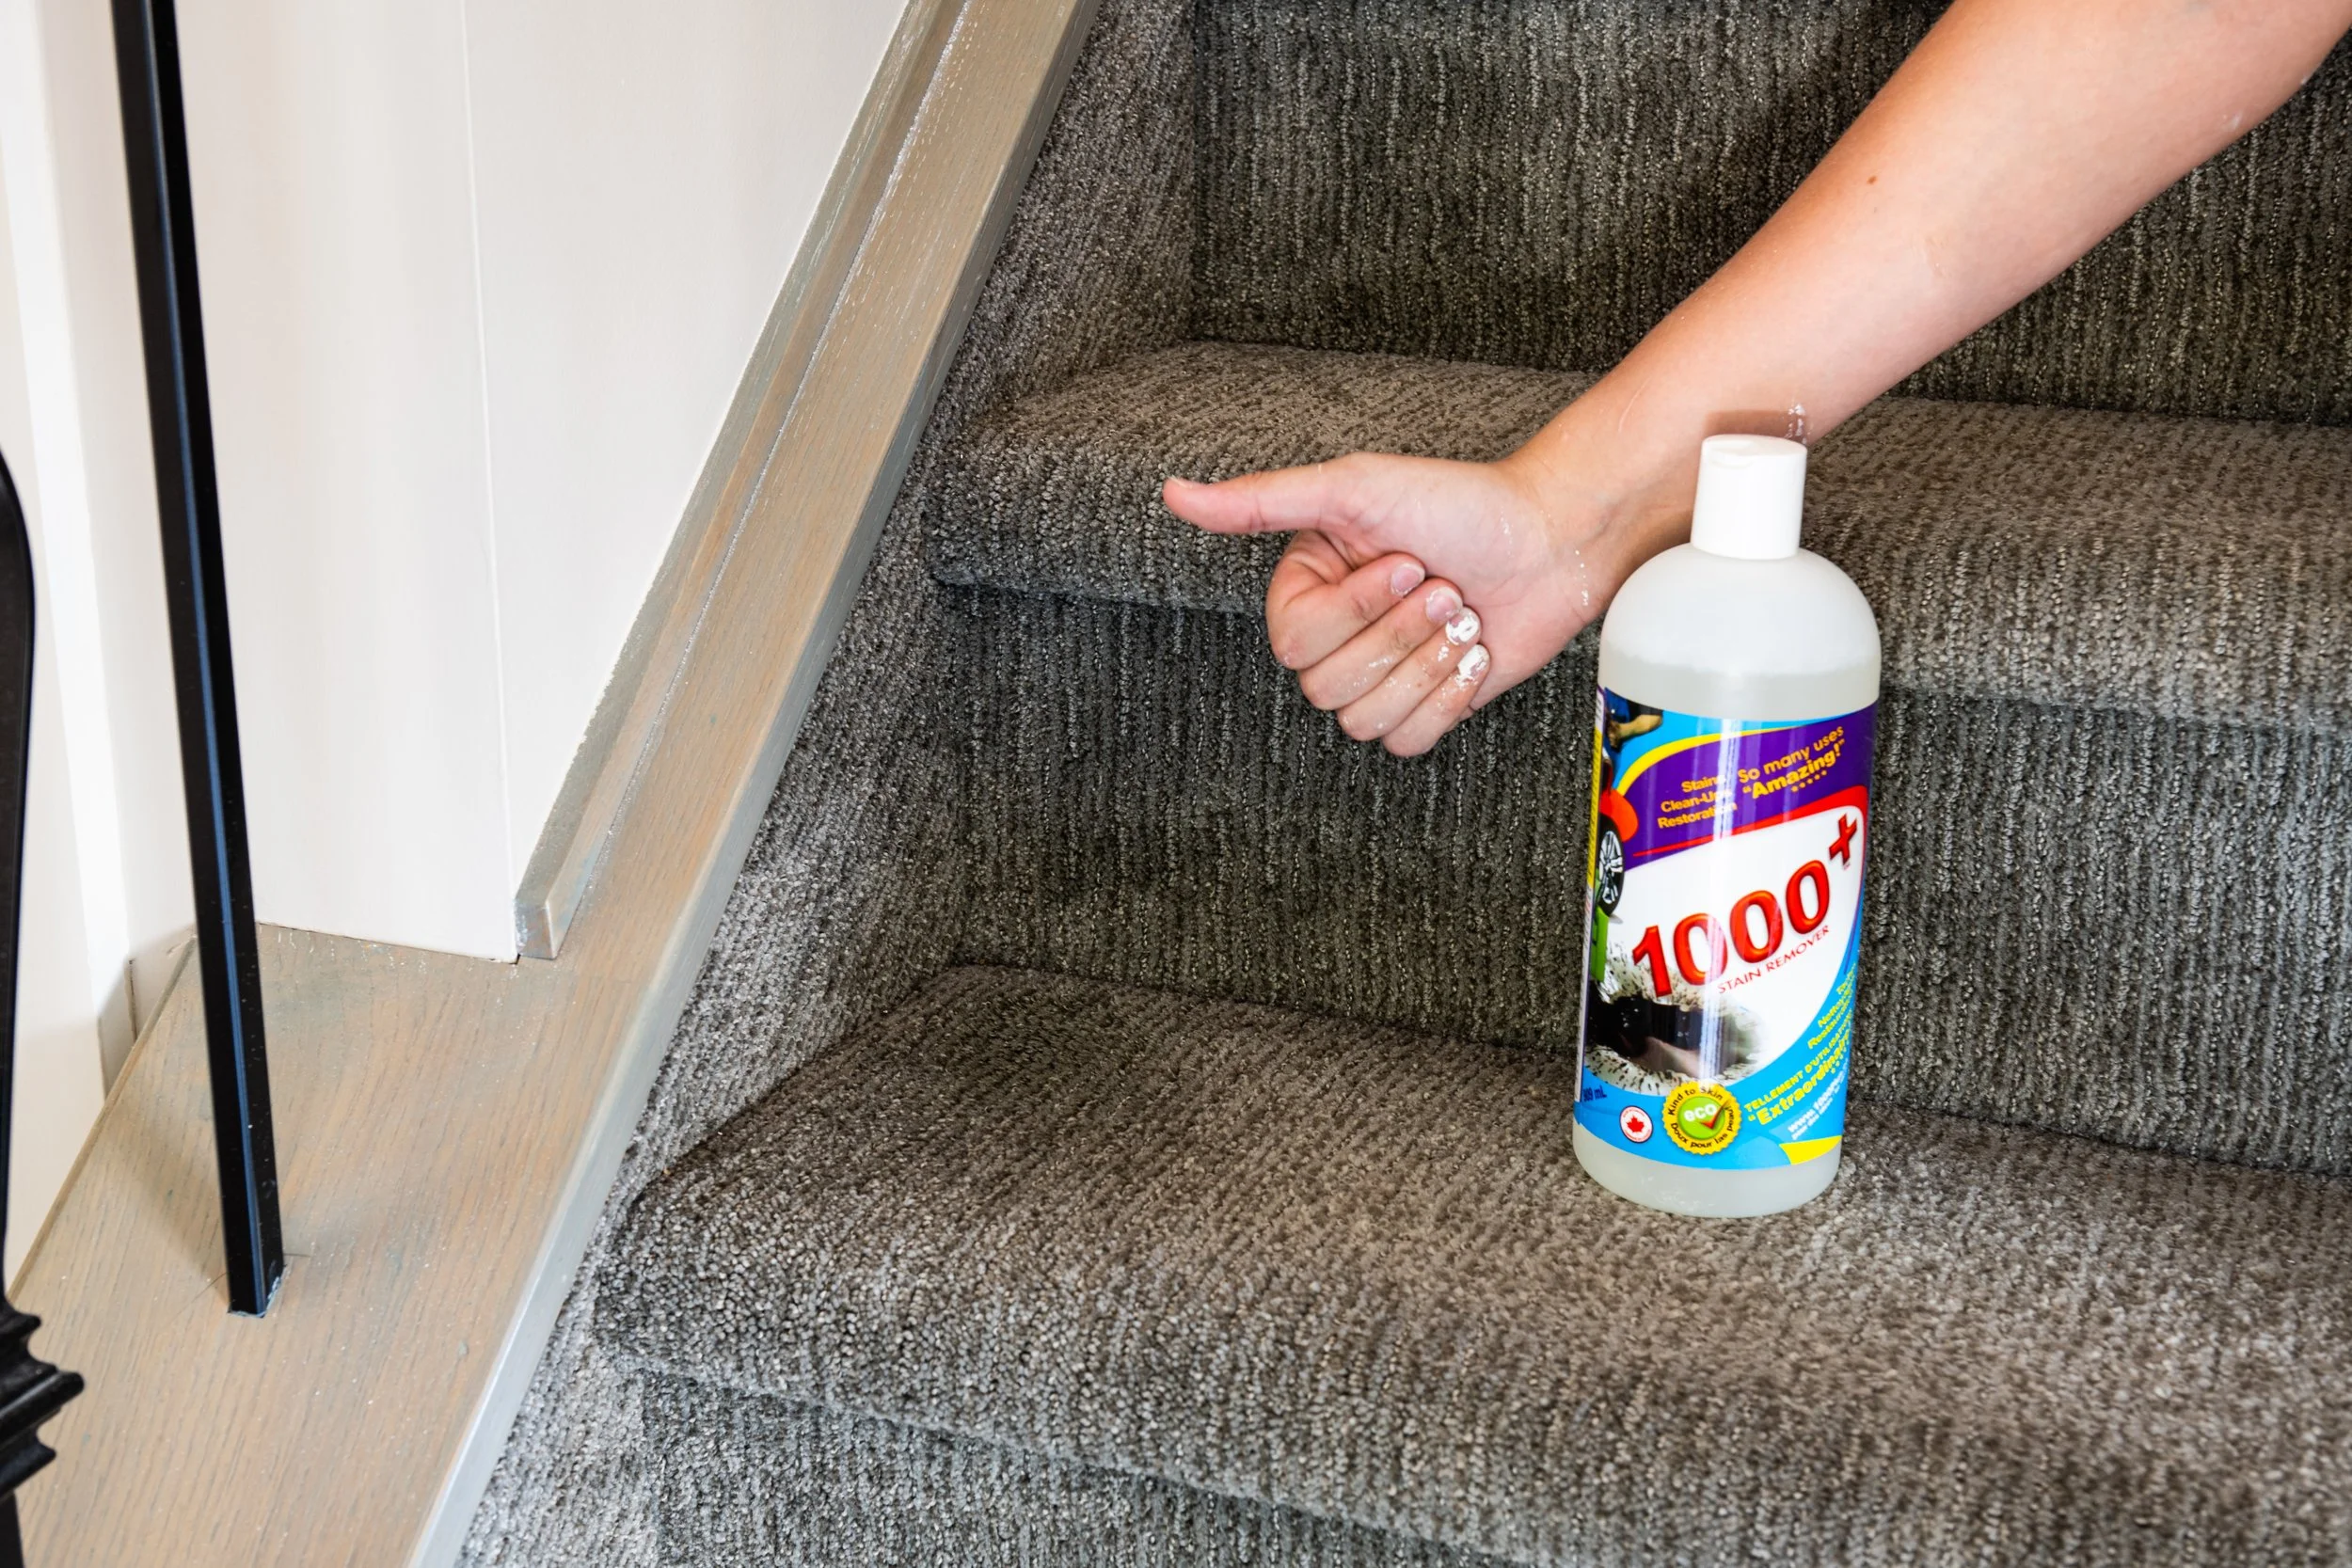
How to Get Paint Out of Carpet

Whoopsies! You’ve taken on the very rewarding task of painting your own space. But unfortunately you’ve been rewarded with a little surprise at the end that must be taken care of next.
NOT TO FEAR! You can now also brag to all your friends how easily you got that little surprise taken care of as well with such ease!
OR you can pretend like it never happened…we didn’t see anything! 👀👀
Let’s start by saying there are two different ways to go about getting the acrylic paint out of your carpet.
the paint is still wet
the paint has dried

If the paint drip on your carpet is still wet, it’s a pretty easy fix.
Take the rag out of your pocket (because a pro ALWAYS has a rag with them, just in case 😉), go and wet a corner of it down with the most amount of water it can handle without dripping everywhere. Take your rag back to the spot and squeeze it some water onto the spot. Now take the dry part of your rag and gently try to rub/pull the paint out of the carpet not that it is super diluted. Repeat as necessary.
How to get DRIED latex paint out of your carpet is MUCH MUCH harder….
Just kidding.
We typically get the job done with this handy dandy product I discovered many many years ago that is like a miracle at removing paint from soft fabrics of many kinds.
Disclaimer: always test a small patch in an inconspicuous spot before committing, ESPECIALLY if it is in a really obvious and/or high traffic spot.
The biggest issue we run into with this product is it makes things SO CLEAN. So therefore if your carpets are a little behind on their yearly steam clean (a thing that everyone here does, right? Because we are professionals?), your paint mark will be gone, but you will now be left with a VERY obvious SUPER CLEAN area surrounded by “not so clean” carpet.
Anyways, the use on this is super easy. Just apply a tiny amount and I MEAN tiny amount to your dried paint drip. Let it sit for about 20 minutes and then use your rag to gently move the carpet fibres around until you have knocked the paint loose enough to be removed. Repeat as necessary.
It is important to use just a tiny dab of this product when you apply, because it is highly concentrated and you can be left with quite a sudsy mess if you accidentally drip too much out. After you have removed the paint and are left with a bit product in the area, or if you have accidentally used too much, your best bet is to do the water/cloth step as we talked about above to make sure there is no residue left behind. Just a nice fresh, paint-less spot!

Uplevel your DIY projects with:
-LIFETIME access to the same contractor rates as we have at any:
Canada -Dulux or Sherwin Williams
USA - Sherwin Williams
-This is more than your basic contractor pricing. We have been working with these suppliers since 2010 and have established AMAZING discounts on our top-recommended products
-Pays for itself usually with the purchase of JUST TWO gallons at our discounted rates!
*Always make sure to check account pricing before having any paint tinted. Costs will vary according to product, make sure to choose a product that fits in your project budget.
Find the perfect white for every wall, trim, and trend.
Choosing a white paint color seems easy—until you’re staring at 200 nearly identical swatches in different lights. This beautifully designed guide takes the guesswork out of choosing the right white by breaking down the 10 most popular white paints used by designers and pros—plus 7 bonus shades that let you know which colors are equivalents of each other and similar whites to the different colors..
Inside, you’ll find:
Clear descriptions of each white’s undertone, warmth, and light reflectance
Real room photos for easy visual comparison
Tips on pairing whites with wood tones, flooring, and countertops
Suggestions for which whites work best with dated finishes from different decades and trends
Guidance on sheen impact and selection
Whether you're painting a modern new build or refreshing a dated home, this ebook can help you avoid costly mistakes and confidently choose the right white—no regrets.
Expert color advice from the comfort of your home.
Choosing paint colors shouldn’t feel overwhelming—or like a guessing game. Our Virtual Color Consultation takes the stress out of selecting the perfect colors, whether you’re refreshing a single room or revamping your entire home. Guided by an experienced designer with a background in the trades, we offer custom-tailored recommendations that align with your lighting, finishes, style, and goals.
Options:
1 Room (1 Color) - Choose this if you are in need of ONE color for ONE room or area. This could be an option for your entire home IF hard finishes (counters, tiles, flooring, cabinets) are the same and/or are matching throughout your home.
Room + 1 (2 Colors) - Choose this if you need ONE main color and one accent color for a room or area. Main color + accent color for a wall for example OR wall color & trim color
Full Color - (up to 3 Colors) - Choose this option if you have a home that needs one main color but also needs an accent color AND/ OR an entirely different color for different rooms due to mismatched surfaces or Renos done on certain rooms.
What's Included:
A simple client intake form to understand your space, style, and needs
Photo or video submission instructions to help us “see” your space clearly
Personalized color recommendations
A selection with brand-specific paint names and finishes (Benjamin Moore, Sherwin-Williams, etc.)
Testing Tips
*3-5 Business Day Turnaround After Qualified Photos Received
You Will Receive Instructions on Hoe to Proceed Once We Receive Your Payment

How Much Paint Do I Need?

A common question we are asked by DIYers in the wild is “How Many Gallons of Paint I will need?”
The answer to this question of course depends on your project and what surfaces you are doing, what color they are vs what color they are going, if it is an “extreme” color change, etc.
Before we get started, let me also tell you I can help you get contractor pricing for LIFE here!
The one thing I can tell you for sure about how much paint you will need is that it’s usually not anywhere close to what the paint store has quoted you. And that sh*t is too expensive to just go buying extra all willy-nilly like that!
Our general rule of thumb is that 1 gallon will do 2 coats of the walls of 1 “average” sized room. Average size may depend on your region and is subject to individual interpretation of course :)

Be Sure to Check Out Our Gear Guide for Additional Tips on Paint Estimating!
A bathroom will typically take less, and of course closets even less so! Rooms with taller ceilings or lots of different walls you can bank on slightly more as well.
Rooms that need more than 2 coats (ex: rooms going anything to white) will need more than 1 gallon for walls.
We usually take the number of average size rooms and then add in our bathrooms, closets, hallways calculation by discretion.

How many gallons of paint you will need for trim is subject to the same rules; fully dependent on how much trim you have (baseboards, window/door), and the number of coats you will need to do.
A common “trim” service we provide to our clients is a “1 coat refresh” on baseboards, whether it be to prepare a home for sale or for the client’s current enjoyment. This service generally will require simply one coat of paint. If we are tackling a condo project and doing all trim and doors, we may only need 1-2 gallons there as well. If you’re unsure of which paint is best to use on your walls or trim, make sure to get our free GEAR GUIDE.

How many gallons of paint you will need for your project also highly depends on the method of application. If you are a brave enough soul to venture into spraying your own project (I do not recommend this for most projects for DIYers), you will need a pretty decent amount more paint than if applied by brush and roller, in most cases.
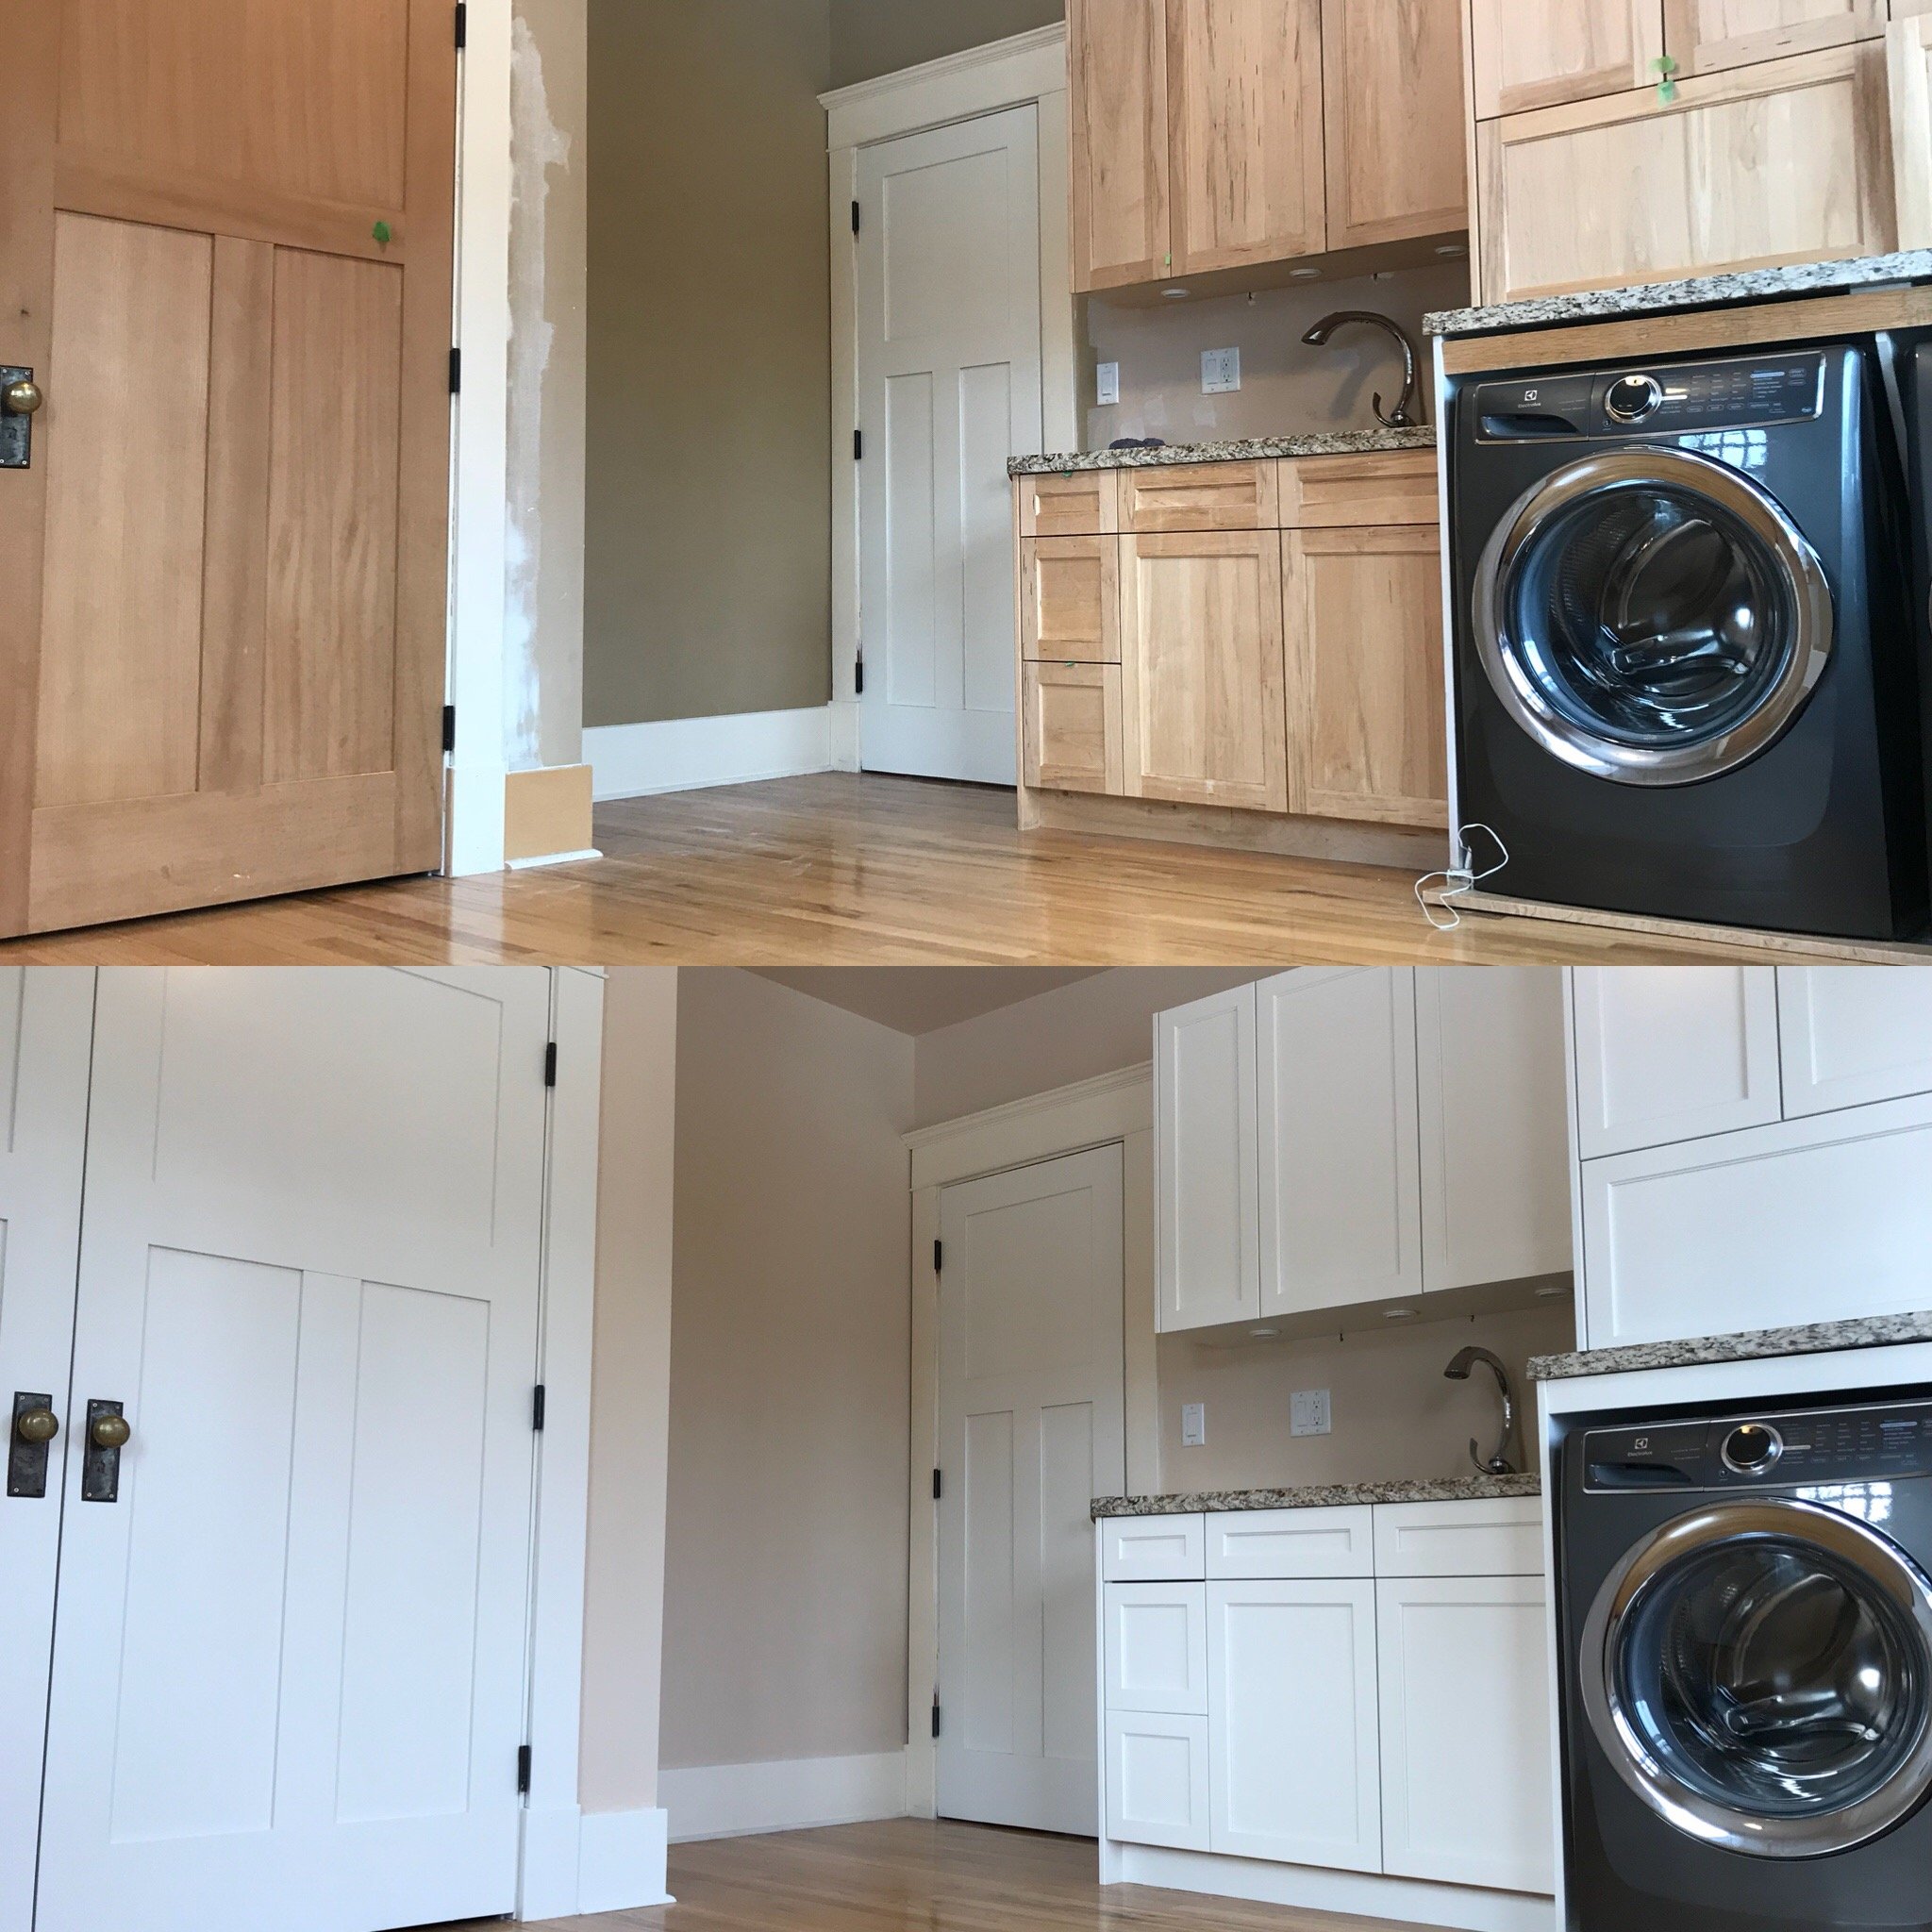
How many gallons of paint you will need to paint your cabinets again relies heavily on how large your kitchen or cabinet area is, and how many coats you will need to do. For example, in the kitchen above, we did two coats of primer to ensure that no tannin from the oak would seep through into the finish coats. We sprayed this kitchen, so the number of gallons was higher than it would have been if we applied the paint by brush/roller.
If you are looking to paint your cabinets, make sure to check out our lesson on “How to Paint Your Cabinets” here!

We discussed how expensive each gallon of paint can be, and if you’re here, chances are you already know!
What if I told you there was a way to get access to our contractor rates on all of your paint purchases going forward? Make sure to check out our Golden Ticket.
Find the perfect white for every wall, trim, and trend.
Choosing a white paint color seems easy—until you’re staring at 200 nearly identical swatches in different lights. This beautifully designed guide takes the guesswork out of choosing the right white by breaking down the 10 most popular white paints used by designers and pros—plus 7 bonus shades that let you know which colors are equivalents of each other and similar whites to the different colors..
Inside, you’ll find:
Clear descriptions of each white’s undertone, warmth, and light reflectance
Real room photos for easy visual comparison
Tips on pairing whites with wood tones, flooring, and countertops
Suggestions for which whites work best with dated finishes from different decades and trends
Guidance on sheen impact and selection
Whether you're painting a modern new build or refreshing a dated home, this ebook can help you avoid costly mistakes and confidently choose the right white—no regrets.
Uplevel your DIY projects with:
-LIFETIME access to the same contractor rates as we have at any:
Canada -Dulux or Sherwin Williams
USA - Sherwin Williams
-This is more than your basic contractor pricing. We have been working with these suppliers since 2010 and have established AMAZING discounts on our top-recommended products
-Pays for itself usually with the purchase of JUST TWO gallons at our discounted rates!
*Always make sure to check account pricing before having any paint tinted. Costs will vary according to product, make sure to choose a product that fits in your project budget.
Expert color advice from the comfort of your home.
Choosing paint colors shouldn’t feel overwhelming—or like a guessing game. Our Virtual Color Consultation takes the stress out of selecting the perfect colors, whether you’re refreshing a single room or revamping your entire home. Guided by an experienced designer with a background in the trades, we offer custom-tailored recommendations that align with your lighting, finishes, style, and goals.
Options:
1 Room (1 Color) - Choose this if you are in need of ONE color for ONE room or area. This could be an option for your entire home IF hard finishes (counters, tiles, flooring, cabinets) are the same and/or are matching throughout your home.
Room + 1 (2 Colors) - Choose this if you need ONE main color and one accent color for a room or area. Main color + accent color for a wall for example OR wall color & trim color
Full Color - (up to 3 Colors) - Choose this option if you have a home that needs one main color but also needs an accent color AND/ OR an entirely different color for different rooms due to mismatched surfaces or Renos done on certain rooms.
What's Included:
A simple client intake form to understand your space, style, and needs
Photo or video submission instructions to help us “see” your space clearly
Personalized color recommendations
A selection with brand-specific paint names and finishes (Benjamin Moore, Sherwin-Williams, etc.)
Testing Tips
*3-5 Business Day Turnaround After Qualified Photos Received
You Will Receive Instructions on Hoe to Proceed Once We Receive Your Payment

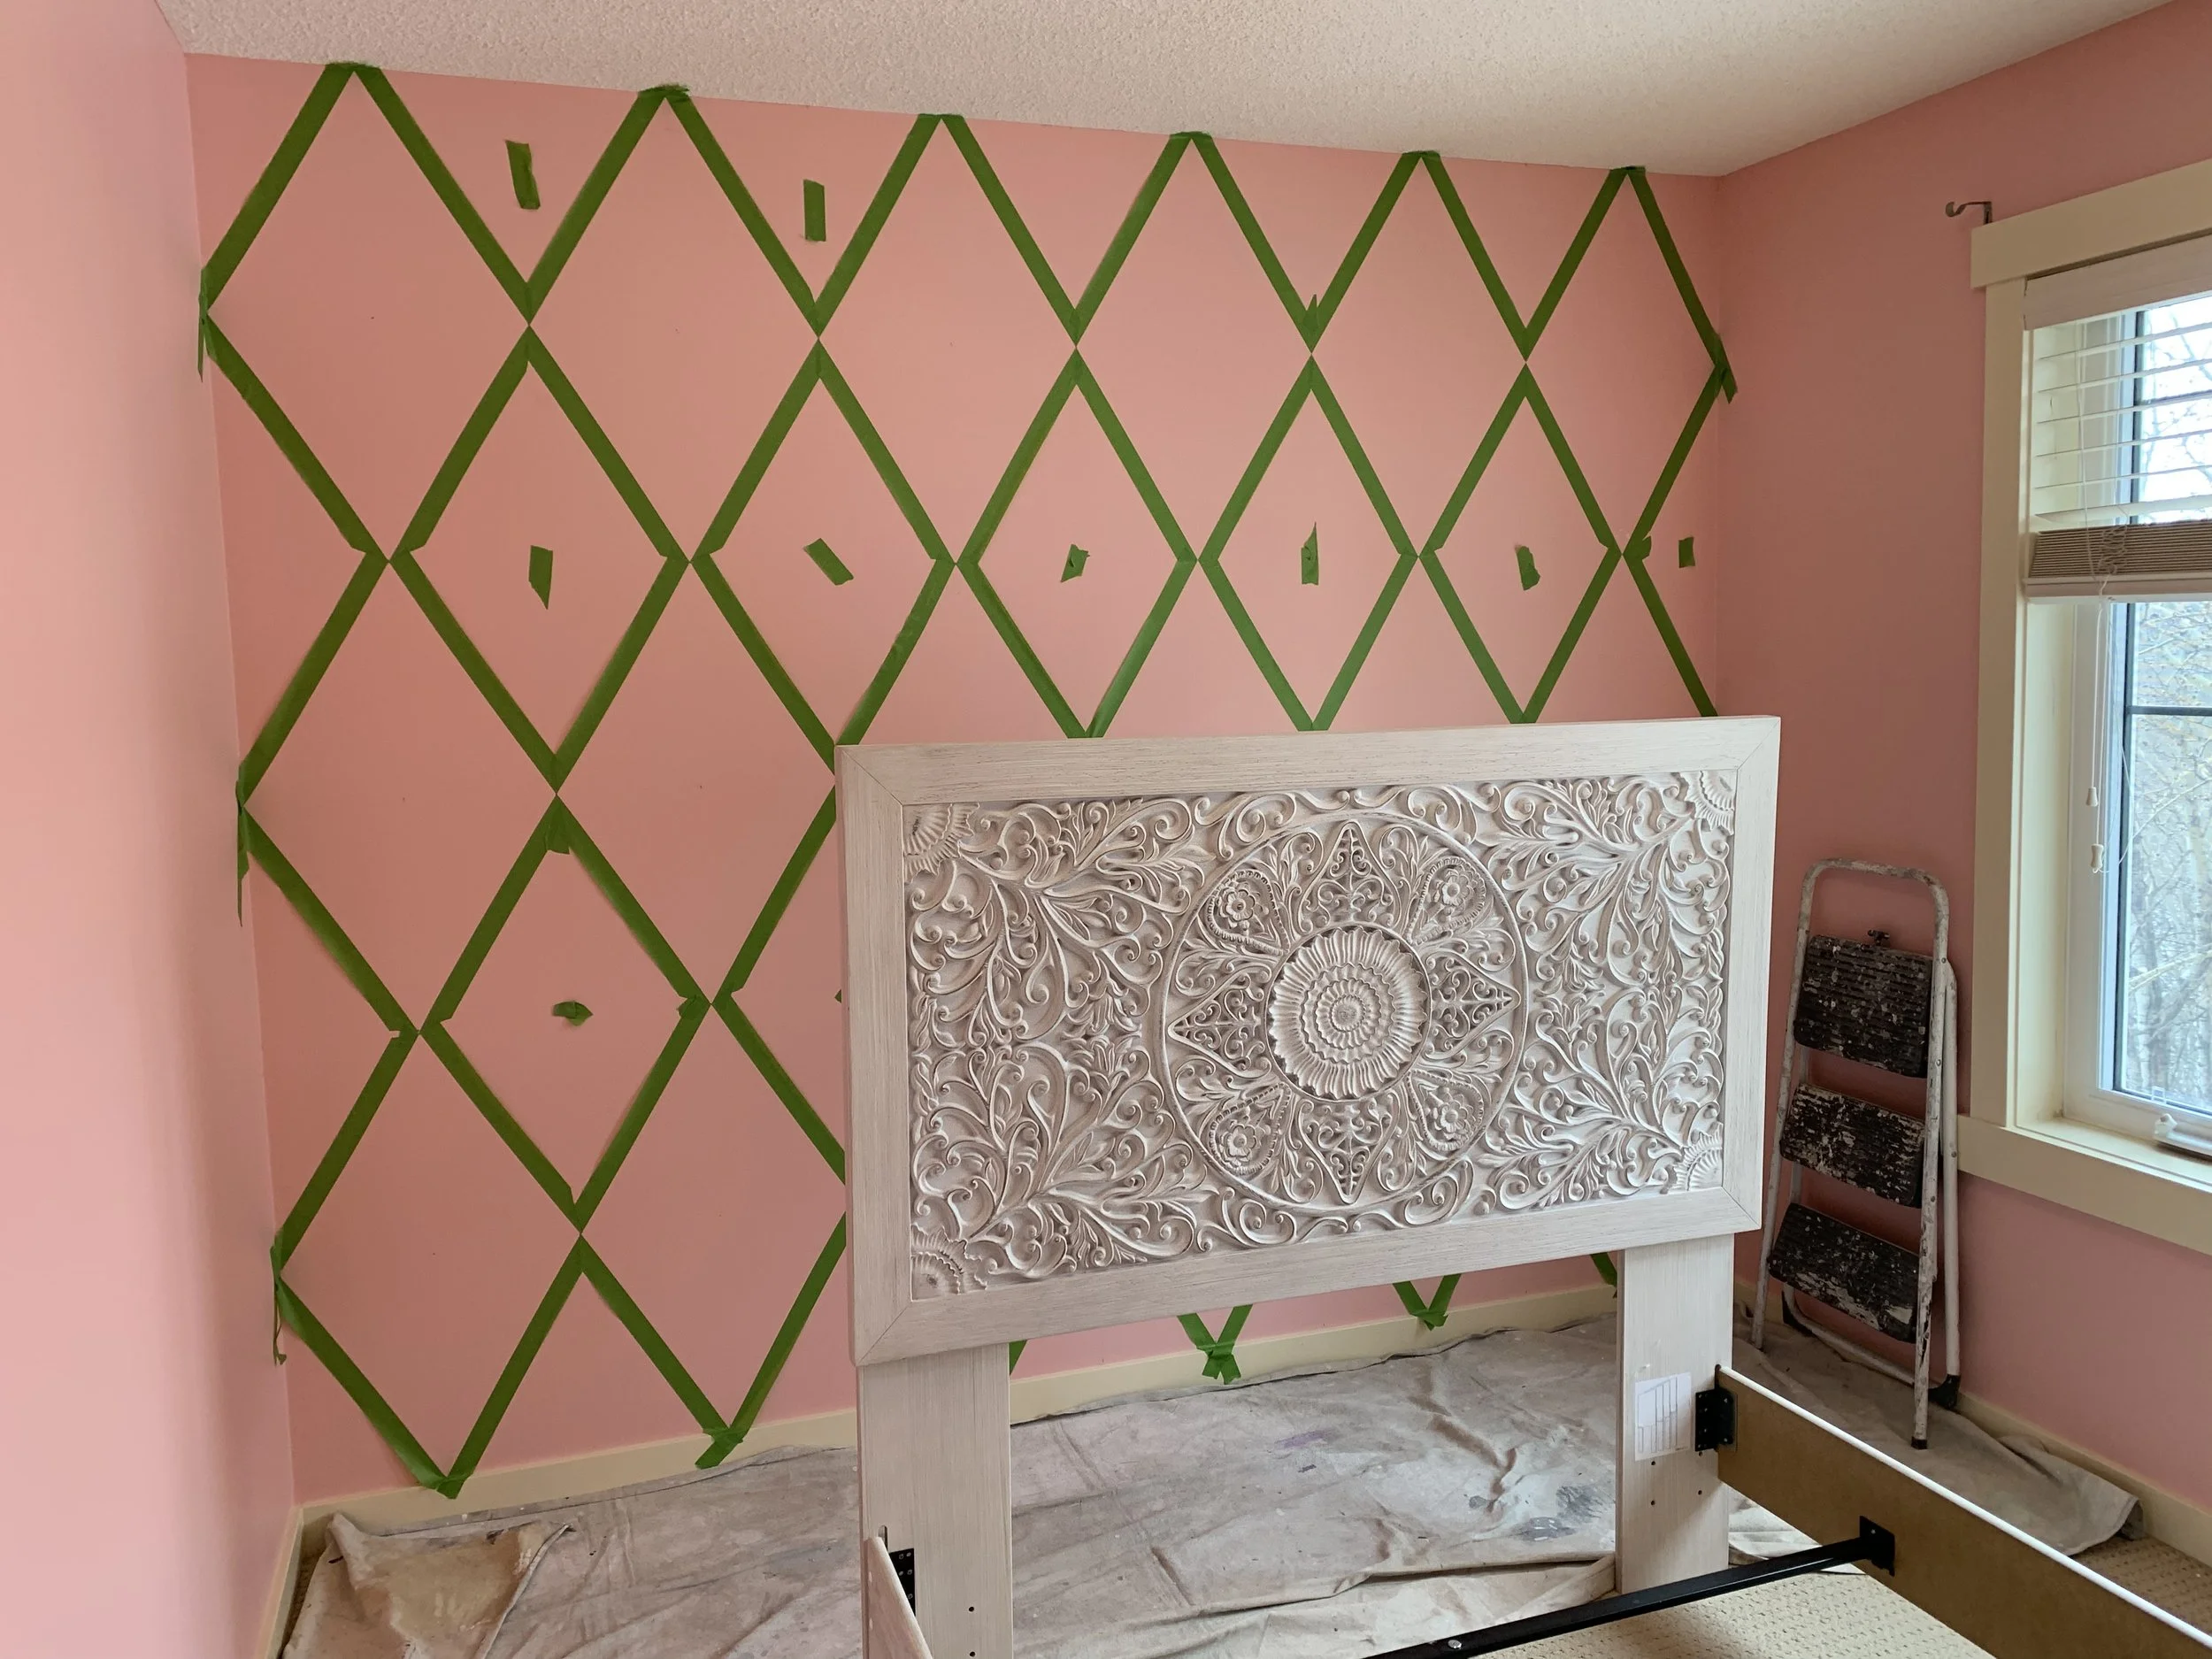
How to Paint An Argyle Wall (Diamond Wall)
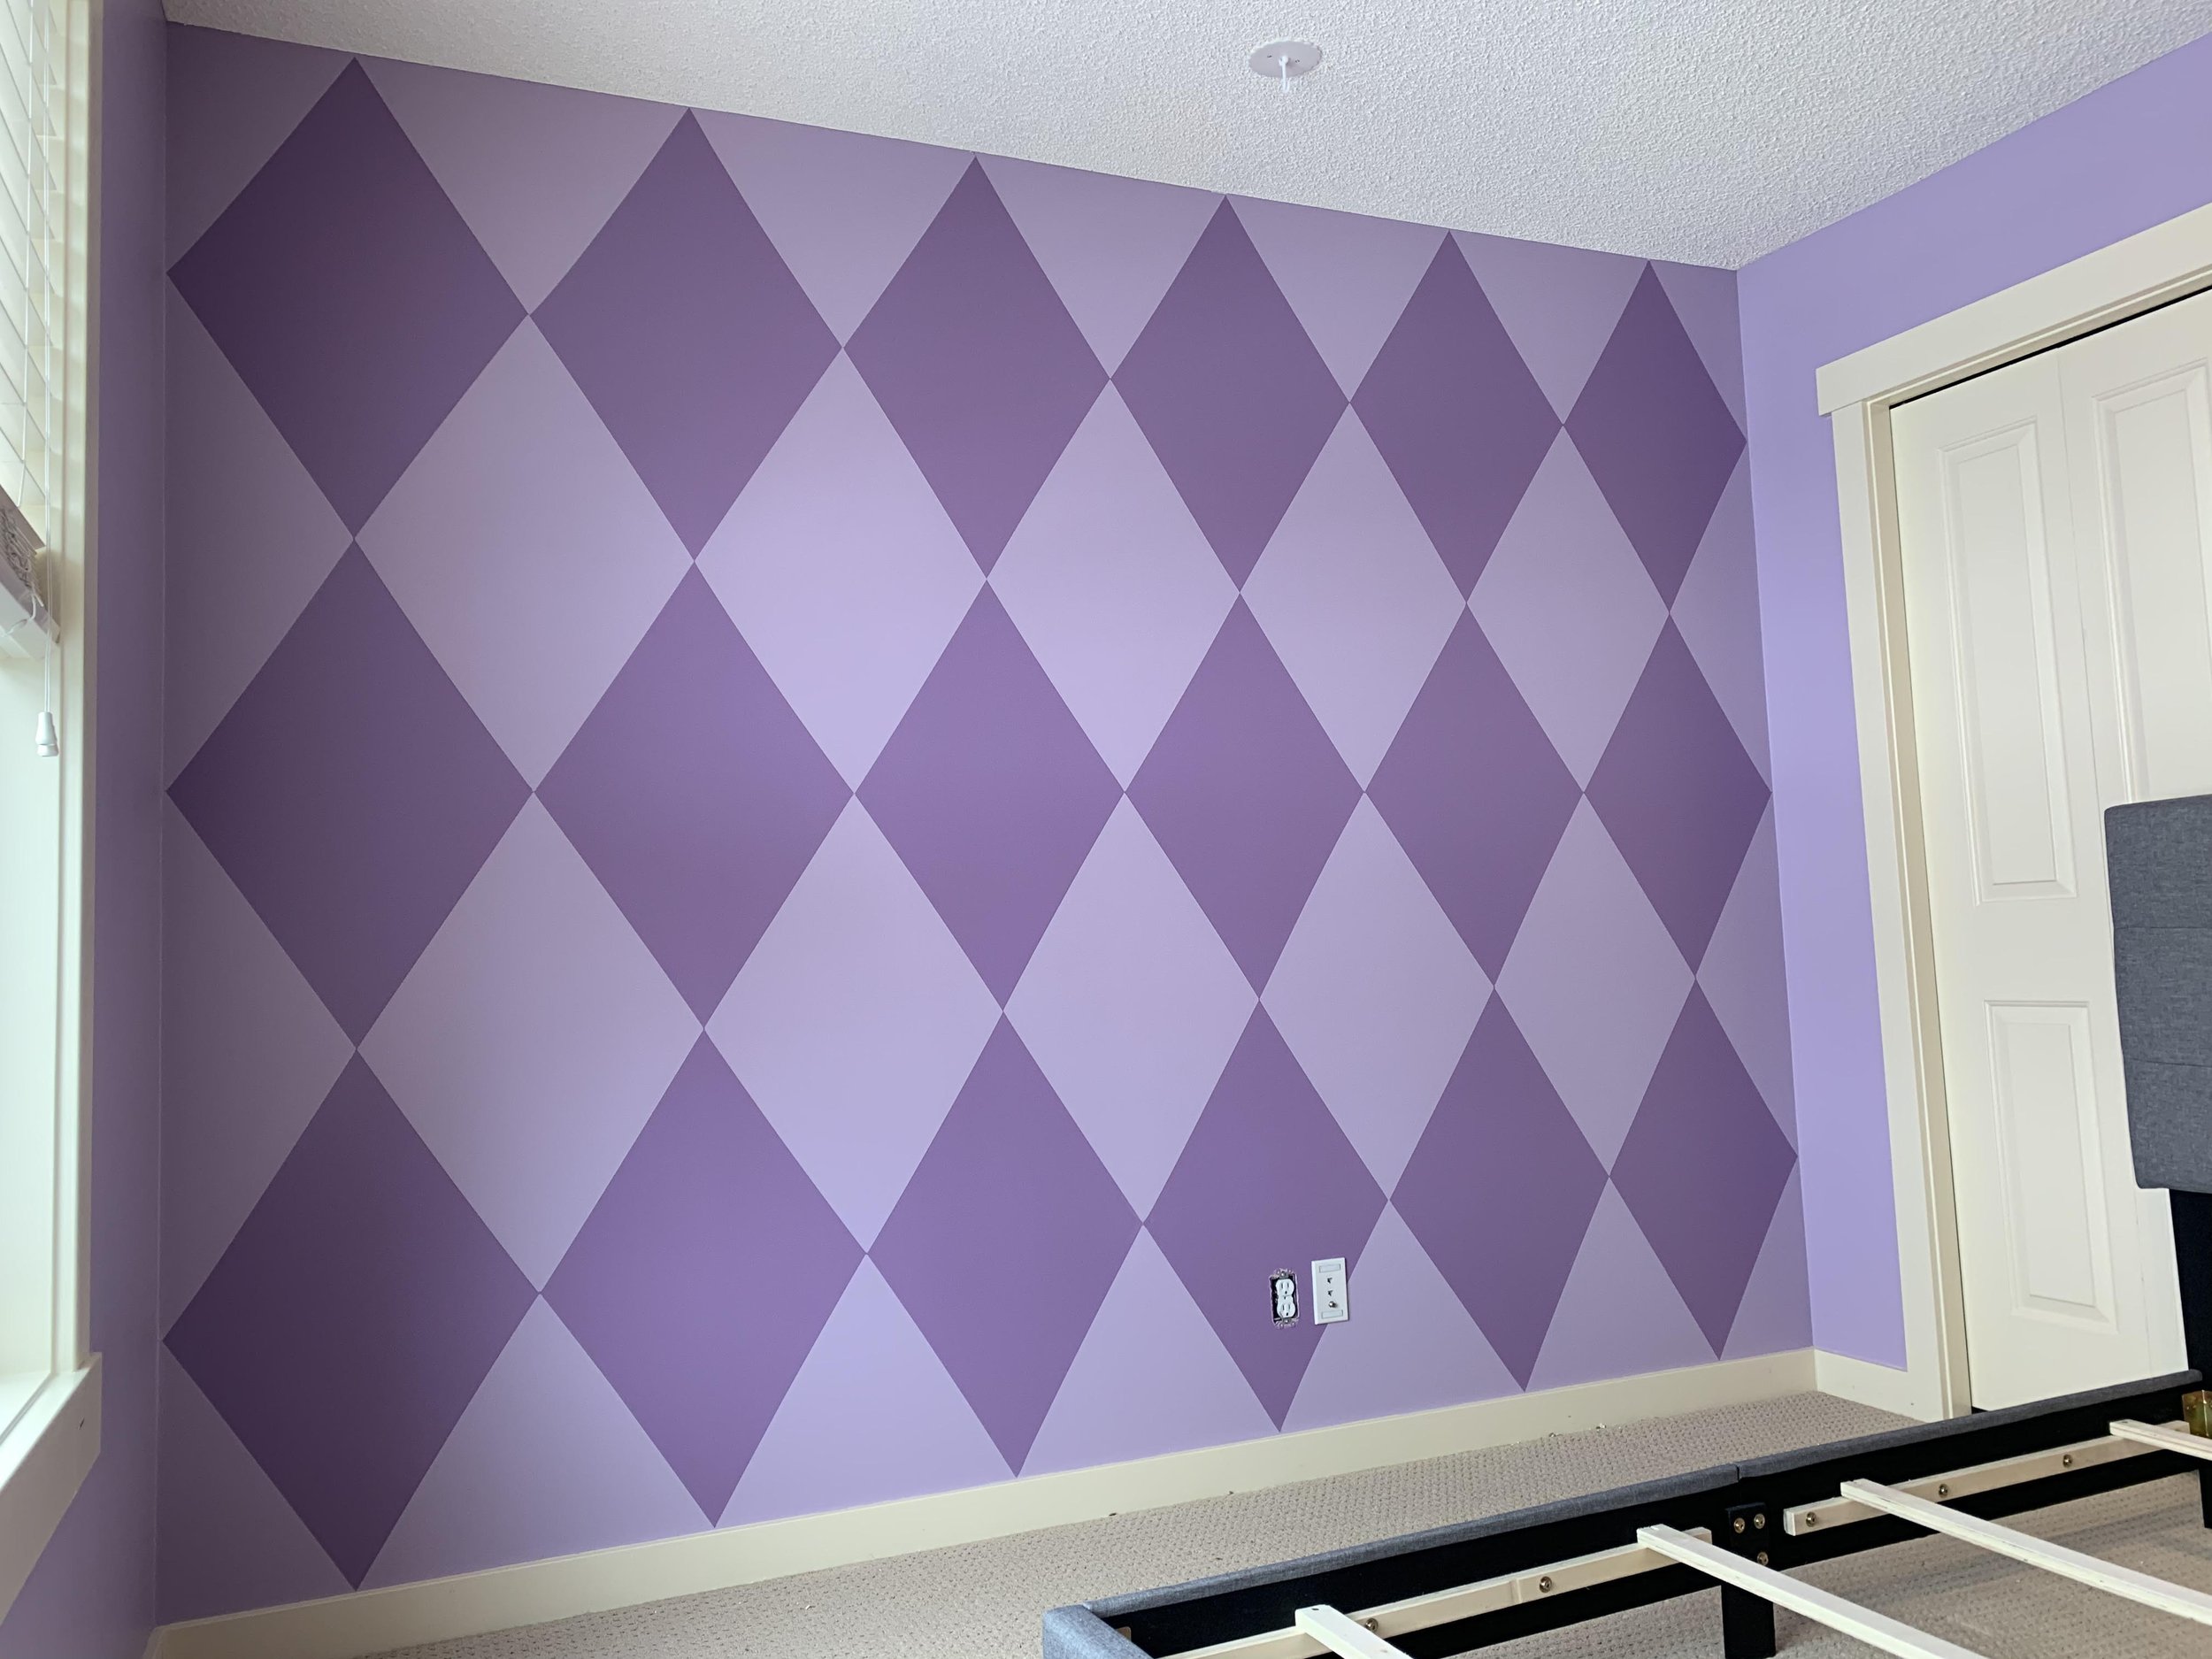
Click on the picture below for step by step instructions on how to complete this awesome argyle patterned wall!
Watch Video Here:
Additional Pictures of Another Room:


Find the perfect white for every wall, trim, and trend.
Choosing a white paint color seems easy—until you’re staring at 200 nearly identical swatches in different lights. This beautifully designed guide takes the guesswork out of choosing the right white by breaking down the 10 most popular white paints used by designers and pros—plus 7 bonus shades that let you know which colors are equivalents of each other and similar whites to the different colors..
Inside, you’ll find:
Clear descriptions of each white’s undertone, warmth, and light reflectance
Real room photos for easy visual comparison
Tips on pairing whites with wood tones, flooring, and countertops
Suggestions for which whites work best with dated finishes from different decades and trends
Guidance on sheen impact and selection
Whether you're painting a modern new build or refreshing a dated home, this ebook can help you avoid costly mistakes and confidently choose the right white—no regrets.
Uplevel your DIY projects with:
-LIFETIME access to the same contractor rates as we have at any:
Canada -Dulux or Sherwin Williams
USA - Sherwin Williams
-This is more than your basic contractor pricing. We have been working with these suppliers since 2010 and have established AMAZING discounts on our top-recommended products
-Pays for itself usually with the purchase of JUST TWO gallons at our discounted rates!
*Always make sure to check account pricing before having any paint tinted. Costs will vary according to product, make sure to choose a product that fits in your project budget.
Expert color advice from the comfort of your home.
Choosing paint colors shouldn’t feel overwhelming—or like a guessing game. Our Virtual Color Consultation takes the stress out of selecting the perfect colors, whether you’re refreshing a single room or revamping your entire home. Guided by an experienced designer with a background in the trades, we offer custom-tailored recommendations that align with your lighting, finishes, style, and goals.
Options:
1 Room (1 Color) - Choose this if you are in need of ONE color for ONE room or area. This could be an option for your entire home IF hard finishes (counters, tiles, flooring, cabinets) are the same and/or are matching throughout your home.
Room + 1 (2 Colors) - Choose this if you need ONE main color and one accent color for a room or area. Main color + accent color for a wall for example OR wall color & trim color
Full Color - (up to 3 Colors) - Choose this option if you have a home that needs one main color but also needs an accent color AND/ OR an entirely different color for different rooms due to mismatched surfaces or Renos done on certain rooms.
What's Included:
A simple client intake form to understand your space, style, and needs
Photo or video submission instructions to help us “see” your space clearly
Personalized color recommendations
A selection with brand-specific paint names and finishes (Benjamin Moore, Sherwin-Williams, etc.)
Testing Tips
*3-5 Business Day Turnaround After Qualified Photos Received
You Will Receive Instructions on Hoe to Proceed Once We Receive Your Payment
What Sheen of Paint Should I Use On Ceilings?
On any surface you paint, it is important to consider what sheen of paint you should use.
What sheen of paint should you use on your ceilings? The answer to that question can differ according to each unique situation.

In the picture above and below, we see a ceiling above a pool that has been painted with a semi-gloss sheen.
In these photos you can clearly see every deficiency in the ceiling and workmanship.

The semi-gloss paint was likely chosen as a way to protect the ceiling from potential splashes and accruing water damage.
Chances are, you would not want to choose this sheen to paint most of the ceilings in your home.
It is used most often on flat ceilings in bathrooms in homes for the same reason; to prevent mold and mildew from growing.
In the picture below, the right sheen was applied, but just applied very poorly or attempted to be “touched up” and you can see how it does not look right.

(Below) is a ceiling from the same home where someone clearly tried to do a “touch up” to this spot in the dining room.
The same rules apply for ceilings as do for walls, but generally worse. You can not plan for a touchup to your section unless it falls under very strict guidelines. You generally must still have the same batch or gallon of paint as was used originally. And even then, the surface color can change over time. You must always plan to paint the full surface, “corner to corner” as we say, to achieve professional results.
This dining room would have had to have been painted all the way out to the walls. It is impossible to match a ceiling paint, all ceiling paints have slightly different formulas.

Uplevel your DIY projects with:
-LIFETIME access to the same contractor rates as we have at any:
Canada -Dulux or Sherwin Williams
USA - Sherwin Williams
-This is more than your basic contractor pricing. We have been working with these suppliers since 2010 and have established AMAZING discounts on our top-recommended products
-Pays for itself usually with the purchase of JUST TWO gallons at our discounted rates!
*Always make sure to check account pricing before having any paint tinted. Costs will vary according to product, make sure to choose a product that fits in your project budget.
Find the perfect white for every wall, trim, and trend.
Choosing a white paint color seems easy—until you’re staring at 200 nearly identical swatches in different lights. This beautifully designed guide takes the guesswork out of choosing the right white by breaking down the 10 most popular white paints used by designers and pros—plus 7 bonus shades that let you know which colors are equivalents of each other and similar whites to the different colors..
Inside, you’ll find:
Clear descriptions of each white’s undertone, warmth, and light reflectance
Real room photos for easy visual comparison
Tips on pairing whites with wood tones, flooring, and countertops
Suggestions for which whites work best with dated finishes from different decades and trends
Guidance on sheen impact and selection
Whether you're painting a modern new build or refreshing a dated home, this ebook can help you avoid costly mistakes and confidently choose the right white—no regrets.
Expert color advice from the comfort of your home.
Choosing paint colors shouldn’t feel overwhelming—or like a guessing game. Our Virtual Color Consultation takes the stress out of selecting the perfect colors, whether you’re refreshing a single room or revamping your entire home. Guided by an experienced designer with a background in the trades, we offer custom-tailored recommendations that align with your lighting, finishes, style, and goals.
Options:
1 Room (1 Color) - Choose this if you are in need of ONE color for ONE room or area. This could be an option for your entire home IF hard finishes (counters, tiles, flooring, cabinets) are the same and/or are matching throughout your home.
Room + 1 (2 Colors) - Choose this if you need ONE main color and one accent color for a room or area. Main color + accent color for a wall for example OR wall color & trim color
Full Color - (up to 3 Colors) - Choose this option if you have a home that needs one main color but also needs an accent color AND/ OR an entirely different color for different rooms due to mismatched surfaces or Renos done on certain rooms.
What's Included:
A simple client intake form to understand your space, style, and needs
Photo or video submission instructions to help us “see” your space clearly
Personalized color recommendations
A selection with brand-specific paint names and finishes (Benjamin Moore, Sherwin-Williams, etc.)
Testing Tips
*3-5 Business Day Turnaround After Qualified Photos Received
You Will Receive Instructions on Hoe to Proceed Once We Receive Your Payment

How to Clean A Paintbrush
This video demonstrates how to wash a paintbrush with latex paint on it.
***You should NEVER wash a paintbrush this way if it has been used with oil-based or other kinds of paint***
Uplevel your DIY projects with:
-LIFETIME access to the same contractor rates as we have at any:
Canada -Dulux or Sherwin Williams
USA - Sherwin Williams
-This is more than your basic contractor pricing. We have been working with these suppliers since 2010 and have established AMAZING discounts on our top-recommended products
-Pays for itself usually with the purchase of JUST TWO gallons at our discounted rates!
*Always make sure to check account pricing before having any paint tinted. Costs will vary according to product, make sure to choose a product that fits in your project budget.
Find the perfect white for every wall, trim, and trend.
Choosing a white paint color seems easy—until you’re staring at 200 nearly identical swatches in different lights. This beautifully designed guide takes the guesswork out of choosing the right white by breaking down the 10 most popular white paints used by designers and pros—plus 7 bonus shades that let you know which colors are equivalents of each other and similar whites to the different colors..
Inside, you’ll find:
Clear descriptions of each white’s undertone, warmth, and light reflectance
Real room photos for easy visual comparison
Tips on pairing whites with wood tones, flooring, and countertops
Suggestions for which whites work best with dated finishes from different decades and trends
Guidance on sheen impact and selection
Whether you're painting a modern new build or refreshing a dated home, this ebook can help you avoid costly mistakes and confidently choose the right white—no regrets.
Expert color advice from the comfort of your home.
Choosing paint colors shouldn’t feel overwhelming—or like a guessing game. Our Virtual Color Consultation takes the stress out of selecting the perfect colors, whether you’re refreshing a single room or revamping your entire home. Guided by an experienced designer with a background in the trades, we offer custom-tailored recommendations that align with your lighting, finishes, style, and goals.
Options:
1 Room (1 Color) - Choose this if you are in need of ONE color for ONE room or area. This could be an option for your entire home IF hard finishes (counters, tiles, flooring, cabinets) are the same and/or are matching throughout your home.
Room + 1 (2 Colors) - Choose this if you need ONE main color and one accent color for a room or area. Main color + accent color for a wall for example OR wall color & trim color
Full Color - (up to 3 Colors) - Choose this option if you have a home that needs one main color but also needs an accent color AND/ OR an entirely different color for different rooms due to mismatched surfaces or Renos done on certain rooms.
What's Included:
A simple client intake form to understand your space, style, and needs
Photo or video submission instructions to help us “see” your space clearly
Personalized color recommendations
A selection with brand-specific paint names and finishes (Benjamin Moore, Sherwin-Williams, etc.)
Testing Tips
*3-5 Business Day Turnaround After Qualified Photos Received
You Will Receive Instructions on Hoe to Proceed Once We Receive Your Payment

How to Match Paint
AKA How to Take A Sample
Ever needed to know what color is on your walls but no longer have the can and have no idea what it is?
You can take a sample to get matched at your local paint store using the directions below.
Disclaimer: If you are hoping this method will allow you to do “touchup” spots on your walls, it is very unlikely that you will be able to successfully do that as the sheen may be different than the product last used (yes, even if it’s egg-shell vs. egg-shell as every company and product can have slightly different sheens under the same definition). This method should get you a close enough match that you can do the whole wall (Corner to Corner) without being able to tell the difference with the wall next to it. Of course make sure your match is correct at the paint store as well before leaving. Ask them to show you the match on the sample to gauge it’s accuracy. Look at it from different angles in different lighting to be sure.
Happy painting!

Uplevel your DIY projects with:
-LIFETIME access to the same contractor rates as we have at any:
Canada -Dulux or Sherwin Williams
USA - Sherwin Williams
-This is more than your basic contractor pricing. We have been working with these suppliers since 2010 and have established AMAZING discounts on our top-recommended products
-Pays for itself usually with the purchase of JUST TWO gallons at our discounted rates!
*Always make sure to check account pricing before having any paint tinted. Costs will vary according to product, make sure to choose a product that fits in your project budget.
Need Color Help?
Find the perfect white for every wall, trim, and trend.
Choosing a white paint color seems easy—until you’re staring at 200 nearly identical swatches in different lights. This beautifully designed guide takes the guesswork out of choosing the right white by breaking down the 10 most popular white paints used by designers and pros—plus 7 bonus shades that let you know which colors are equivalents of each other and similar whites to the different colors..
Inside, you’ll find:
Clear descriptions of each white’s undertone, warmth, and light reflectance
Real room photos for easy visual comparison
Tips on pairing whites with wood tones, flooring, and countertops
Suggestions for which whites work best with dated finishes from different decades and trends
Guidance on sheen impact and selection
Whether you're painting a modern new build or refreshing a dated home, this ebook can help you avoid costly mistakes and confidently choose the right white—no regrets.
Expert color advice from the comfort of your home.
Choosing paint colors shouldn’t feel overwhelming—or like a guessing game. Our Virtual Color Consultation takes the stress out of selecting the perfect colors, whether you’re refreshing a single room or revamping your entire home. Guided by an experienced designer with a background in the trades, we offer custom-tailored recommendations that align with your lighting, finishes, style, and goals.
Options:
1 Room (1 Color) - Choose this if you are in need of ONE color for ONE room or area. This could be an option for your entire home IF hard finishes (counters, tiles, flooring, cabinets) are the same and/or are matching throughout your home.
Room + 1 (2 Colors) - Choose this if you need ONE main color and one accent color for a room or area. Main color + accent color for a wall for example OR wall color & trim color
Full Color - (up to 3 Colors) - Choose this option if you have a home that needs one main color but also needs an accent color AND/ OR an entirely different color for different rooms due to mismatched surfaces or Renos done on certain rooms.
What's Included:
A simple client intake form to understand your space, style, and needs
Photo or video submission instructions to help us “see” your space clearly
Personalized color recommendations
A selection with brand-specific paint names and finishes (Benjamin Moore, Sherwin-Williams, etc.)
Testing Tips
*3-5 Business Day Turnaround After Qualified Photos Received
You Will Receive Instructions on Hoe to Proceed Once We Receive Your Payment

How Lighting Affects Paint Color
Don't believe lighting affects how your paint color looks? Check out these photos.
When this office was painted, the color wasn't quite what it appeared to be on the sample. The lighting was way too harsh for the chosen color. They changed up the bulb situation for a much warmer and cozier effect. ☀️
When choosing colors for your home, we always recommend that the lighting conditions are the same as what you will be enjoying the space with (overhead, lamps, etc.). We also recommend making sure to check out your colors in each room the color is going in, in different locations in the room, and in different times of the day.
The photos below show a range from 2700K to 6000K.


Find the perfect white for every wall, trim, and trend.
Choosing a white paint color seems easy—until you’re staring at 200 nearly identical swatches in different lights. This beautifully designed guide takes the guesswork out of choosing the right white by breaking down the 10 most popular white paints used by designers and pros—plus 7 bonus shades that let you know which colors are equivalents of each other and similar whites to the different colors..
Inside, you’ll find:
Clear descriptions of each white’s undertone, warmth, and light reflectance
Real room photos for easy visual comparison
Tips on pairing whites with wood tones, flooring, and countertops
Suggestions for which whites work best with dated finishes from different decades and trends
Guidance on sheen impact and selection
Whether you're painting a modern new build or refreshing a dated home, this ebook can help you avoid costly mistakes and confidently choose the right white—no regrets.

This collection of 10 Most Popular Whites Sample Boards is the perfect tool to help you choose the perfect whites for your spaces.
Hand painted on 12.5”x9.5” thick card stock with REAL paint.
Colors Include:
-Chantilly Lace
-Cloud White
-Alabaster
-Greek Villa
-White Diamond
-White Dove
-Ivory White
-Oxford White
-Simply White
-High Reflective White
This set comes with a guide on best practices for choosing the white for your space.
Discounts available for #piparmy members.
Uplevel your DIY projects with:
-LIFETIME access to the same contractor rates as we have at any:
Canada -Dulux or Sherwin Williams
USA - Sherwin Williams
-This is more than your basic contractor pricing. We have been working with these suppliers since 2010 and have established AMAZING discounts on our top-recommended products
-Pays for itself usually with the purchase of JUST TWO gallons at our discounted rates!
*Always make sure to check account pricing before having any paint tinted. Costs will vary according to product, make sure to choose a product that fits in your project budget.

How to Hire A Painting Contractor
When hiring a professional painter, or any contractor coming into your home, it is important to ask them questions to ensure that you and your most valuable assets are protected if anything were to go wrong. During the painting process, there are generally many little hurdles to overcome to achieve your dream paint job, but you want to make sure your contractor has the right insurance in place in case anything were to go REALLY wrong.
Some things to ask your paint contractor before hiring:
How long have you been in business?
Are you registered, licensed, insured?
What about the workers? Do you have WCB coverage?
How much will it cost? When is the payment due?
Is the quote guaranteed? What if there are any unexpected costs?
We hope that we have answered any questions you may have about hiring a professional painter for your project. If you are looking for a referral for a local painter in your area, contact us!

When do I need to prime when painting?
This is a question we get asked about ALL the time! Priming can be a make or break on certain (areas) of paint jobs. Sometimes we do get clients that are super educated on the paint process that even assume primer is needed on some areas in which it is not necessary. Although we love to play by the rules and ensure a top quality finish, some times it just impacts the efficiency of a high-quality job in a negative way (for no reason!).
There are many different types of primer, both for interior painting OR exterior painting. Some primers can be used for both, under different applications. Much like paint, there are latex based primers or oil based primers. If you are doing the painting yourself, it will be a good idea for you to ask your paint representative for the best recommendation for your project. Keep in mind that each surface generally requires a different level/process of preparation before painting. If you are having a professional painter in your home (like us!), we will generally provide all primer required for any sections of the paint project. Primer is something we have in our general stock of supplies required to complete your paint project.
Some areas where primer may be required on your paint project are:
-fresh drywall
-stained/inked drywall, ceilings, trim
-stained/fresh wood to be painted interior or exterior
-peeling or worn areas of wood, stucco
-dark or colourful walls or other areas going white or lighter colors
-walls or other sections being painted a dark or bright color like Red
Some areas where primer is not required on your paint project are":
-entire rooms going a similar color or shade
-wood that will be stained in any way
As mentioned, sometimes areas being painted in to a drastic color change might be primed before painting. If the color change is questionable if it warrants a primer, we may just try for 2 coats and add a third of the new color as required.
We hope this helps in your quest for knowledge about priming before paint jobs! As always, feel free to reach out for more specific answers to your painting questions, or contact us for a referral to someone in our professional painting network.

How to paint an entire room - the professional painters way
Whether you’ve decided to tackle painting a room yourself, or you’ve hired some professional painters to come and do it for you; did you know there is in fact a proper way in which to paint an entire room?
The order in which you paint all the surfaces in the room is SUPER important, and will actually save you time AND money!
As a general rule in professional painting, you should always be starting at the top and working your way down. This goes for surfaces, as well as the way you approach each surface with the paint.
So what are we talking about?
Well, let’s say you are painting your ceiling, walls, doors, as well as trim.
You should always be painting your ceiling before you paint any other surfaces. As with any time you are using paint, it is likely to have some drips, and is ideal that if they are to happen, that they are dripping on walls that haven’t been painted yet. Did you know that if you are painting the whole room, you can and actually are encouraged to get some of that ceiling paint on the top of the walls as well? Talk about a time saving tip! Also, if you ensure that you overlap the ceiling paint onto the walls, you are actually ensuring that when you go to paint the walls, that you have a nice fresh start to getting that perfect ceiling cut line!
The next area you would want to paint is the trim. The reason for painting the trim second, is actually the same as the ceiling. Make sure that when you are painting the trim, you go over onto the walls so that you have a nice blank slate to make that amazing cut line with the wall paint next to! If you’ve ever painted just the trim of your space, you know how tricky it can be to make those cut lines on the side of the trim, without making a mess. AND how much longer it takes.
Now that you’ve got your ceiling and your trim painted, the next step is to paint the walls. Again, our approach is to start at the top and work our way down on each surface. A good method to remember on any surface you are painting is “top to bottom, left to right”. That means starting in your top left corner and working your way across and down the wall, trim, or whatever it may be.
Next up you will want to paint your doors. Now technically you could do this at any phase of the painting. We typically like to do them last if it makes sense to, to eliminate the risk of any of the other products dripping on them and needing a touch up after. But it’s totally up to you! You can see how they could fit in almost anywhere in this painting equation.
Of course there are exceptions to any rule, but now you’ve got a general idea of how to approach painting any room to do it in the fastest and most time efficient way.
If you don’t feel comfortable tacking any aspect of your room, you can always contact us for a referral partner in your area.

What will it cost to paint my house?
Painting is one of the easiest and most budget-friendly ways to make the biggest impact on your house. Whether it be your current home or an investment property, new paint can make the world of difference in how you and others see your home. It also serves as protection for many of the surfaces on the exterior and the interior of the home.
Before any projects begin, you must of course know your budget, and how much it will cost to paint your home.
There are many factors to consider when getting a quote for professional painting. Many clients believe that they will be quoted based on the typically stated “square footage” of their home. While that does play a factor, there can be many different wall/room layouts from one house to the next, and it makes things quite difficult to quote for painting. Other factors to consider when getting a quote for professional painting is the height of the ceilings (or siding, if you are painting exterior), the complexity of the cut lines to be painted, and the level of preparation required. What that means is that not all walls are created equally!
Depending on the colour of your surface, and the colour you are looking to achieve when house painting, some surfaces may require a primer prior to painting, and some surfaces may require several coats of paint. Some surfaces may require extensive prep work compared to others as well.
As you can see, quoting for house painting is a complex process, with a lot of factors to consider. There are several things for a professional painter to look at when providing you with an accurate paint quote. It is very important to have the experience needed to know how much product and time is required, so that there are no surprise costs during the process, or when the project is complete.
If you’re looking for a quote for painting in your area, contact us for a referral!


How to Paint Your Cabinets
Step by Step Instructions of How to Paint Your Cabinets with Brush/Roller.
This is the first video I ever shot and edited!
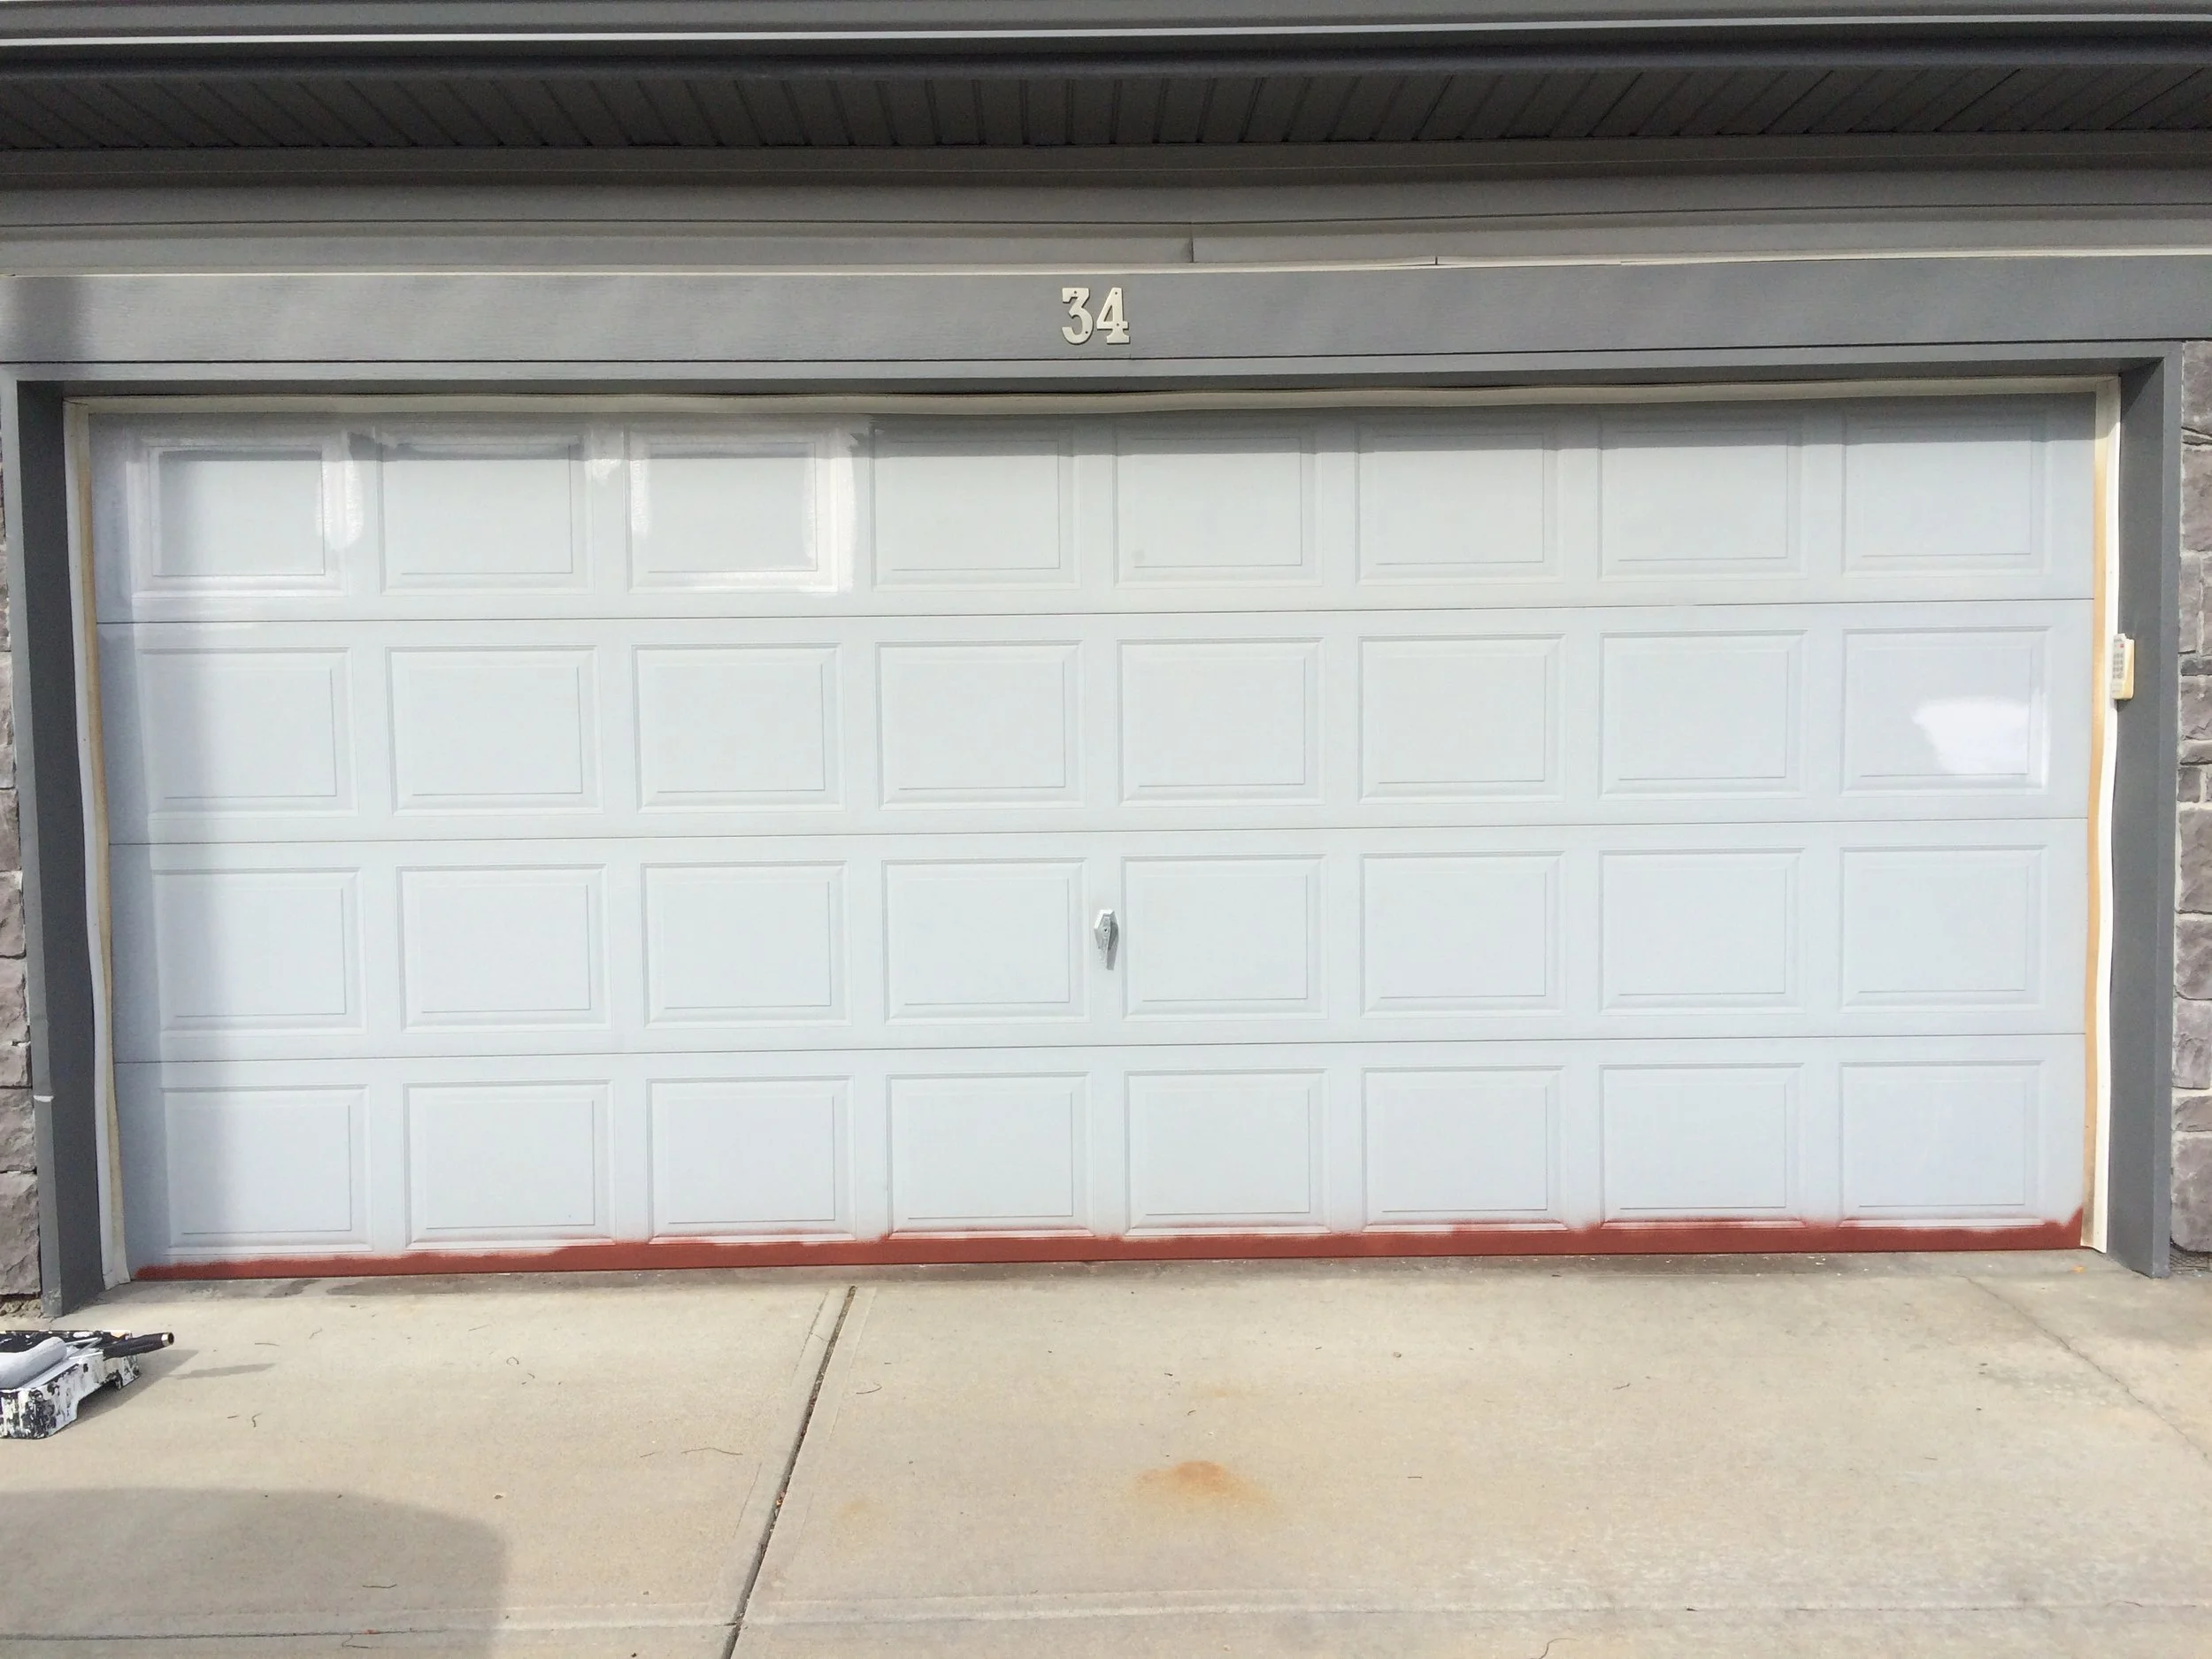
How to Paint A Garage Door

An extremely common piece of your exterior that’s likely to fail is the bottom of your metal (and let’s face it, ANY) garage door.
Today we will talk about your aluminum garage door and what you can do to remedy the situation.
Now, for this set of photos, I forgot to take a picture of what it looked like initially. But if you’re here, chances are you already know. ;)
The first step you are going to take is to clean up that rust and get yourself as smooth and rust free as you possibly can. A wire brush usually works best or sandpaper. Go very gently and adjust the pressure as you need to.

The next step is to apply some bondo to the damaged area. Again, your goal is to fix damage, fill any holes, and create a nice smooth surface to paint over.
Once that is dry, you may have guessed it….your next step is sanding. As a psuedo-professional painter, sandpaper is like your number 3 best friend. So if you hate doing it (we all do), you’re going to want to make friends with it and accept it for what it is - a giant pain in the ass.
Next step is another kind of pain thing to do, and it’s priming.
The good news - Now depending on your door, AND which product you are putting on it, you may not have to prime the WHOLE thing. You will definitely need to prime the repaired spots, and any other possible problem areas. Not all primers are created equally, so make sure to talk with your local paint store about which primer (and paint) they recommend you using for your specific situation. I will be creating some guides, but every region has different product offerings.

Follow up with your paint (number of coats totally depends on what color you are, what color you are going, etc).
When painting, start with your cuts (As Shown Above) and follow up with your rolls. Keep that wet edge as you go, meaning don't let your cuts dry before you roll them.
As you start each new section, double back quickly to the last section you painted to make sure any drips or runs aren’t forming and lightly tap them off with your brush or roller.
As always, work top to bottom, left to right to keep yourself organized and complete the project in the fastest way possible.

Finished lower corner repair.

Want pro painter prices for your next project? Be sure to check out our Golden Ticket here.
Uplevel your DIY projects with:
-LIFETIME access to the same contractor rates as we have at any:
Canada -Dulux or Sherwin Williams
USA - Sherwin Williams
-This is more than your basic contractor pricing. We have been working with these suppliers since 2010 and have established AMAZING discounts on our top-recommended products
-Pays for itself usually with the purchase of JUST TWO gallons at our discounted rates!
*Always make sure to check account pricing before having any paint tinted. Costs will vary according to product, make sure to choose a product that fits in your project budget.
Find the perfect white for every wall, trim, and trend.
Choosing a white paint color seems easy—until you’re staring at 200 nearly identical swatches in different lights. This beautifully designed guide takes the guesswork out of choosing the right white by breaking down the 10 most popular white paints used by designers and pros—plus 7 bonus shades that let you know which colors are equivalents of each other and similar whites to the different colors..
Inside, you’ll find:
Clear descriptions of each white’s undertone, warmth, and light reflectance
Real room photos for easy visual comparison
Tips on pairing whites with wood tones, flooring, and countertops
Suggestions for which whites work best with dated finishes from different decades and trends
Guidance on sheen impact and selection
Whether you're painting a modern new build or refreshing a dated home, this ebook can help you avoid costly mistakes and confidently choose the right white—no regrets.
This collection of 10 Most Popular Whites Sample Boards is the perfect tool to help you choose the perfect whites for your spaces.
Hand painted on 12.5”x9.5” thick card stock with REAL paint.
Colors Include:
-Chantilly Lace
-Cloud White
-Alabaster
-Greek Villa
-White Diamond
-White Dove
-Ivory White
-Oxford White
-Simply White
-High Reflective White
This set comes with a guide on best practices for choosing the white for your space.
Discounts available for #piparmy members.